A Basement Bar with Speakeasy vibes

Basement bar reveal

Created in Partnership with the Home Depot


I’ve been working around the clock the past few months to create this speakeasy inspired basement bar. This bar and half kitchen are part of an entire basement project I’ve been working on for a friend this past year, and it’s been exciting to see all of the tireless hours of planning pan out.  It’s also the first time I’ve taken on an entire home remodel that includes new construction, so the process has been quite the learning curve to say the least.

I had no idea how many setbacks and challenges I would encounter during this project. My novice beginner optimism concluded we would be finished in a matter of weeks, but as it turns out when dealing with multiple contractors, the delays piled one upon the other, and weeks turned into months as the completion of this project stretched on and on.  On the bright side, this makes the reveal that much sweeter as this project has been such a labor of love! Yesterday after the kitchen was fully put together, I laid out a charcuterie board and invited my design partner Courtney, who has helped me every step of the way, along with her family to come celebrate the completion of such a massive project.

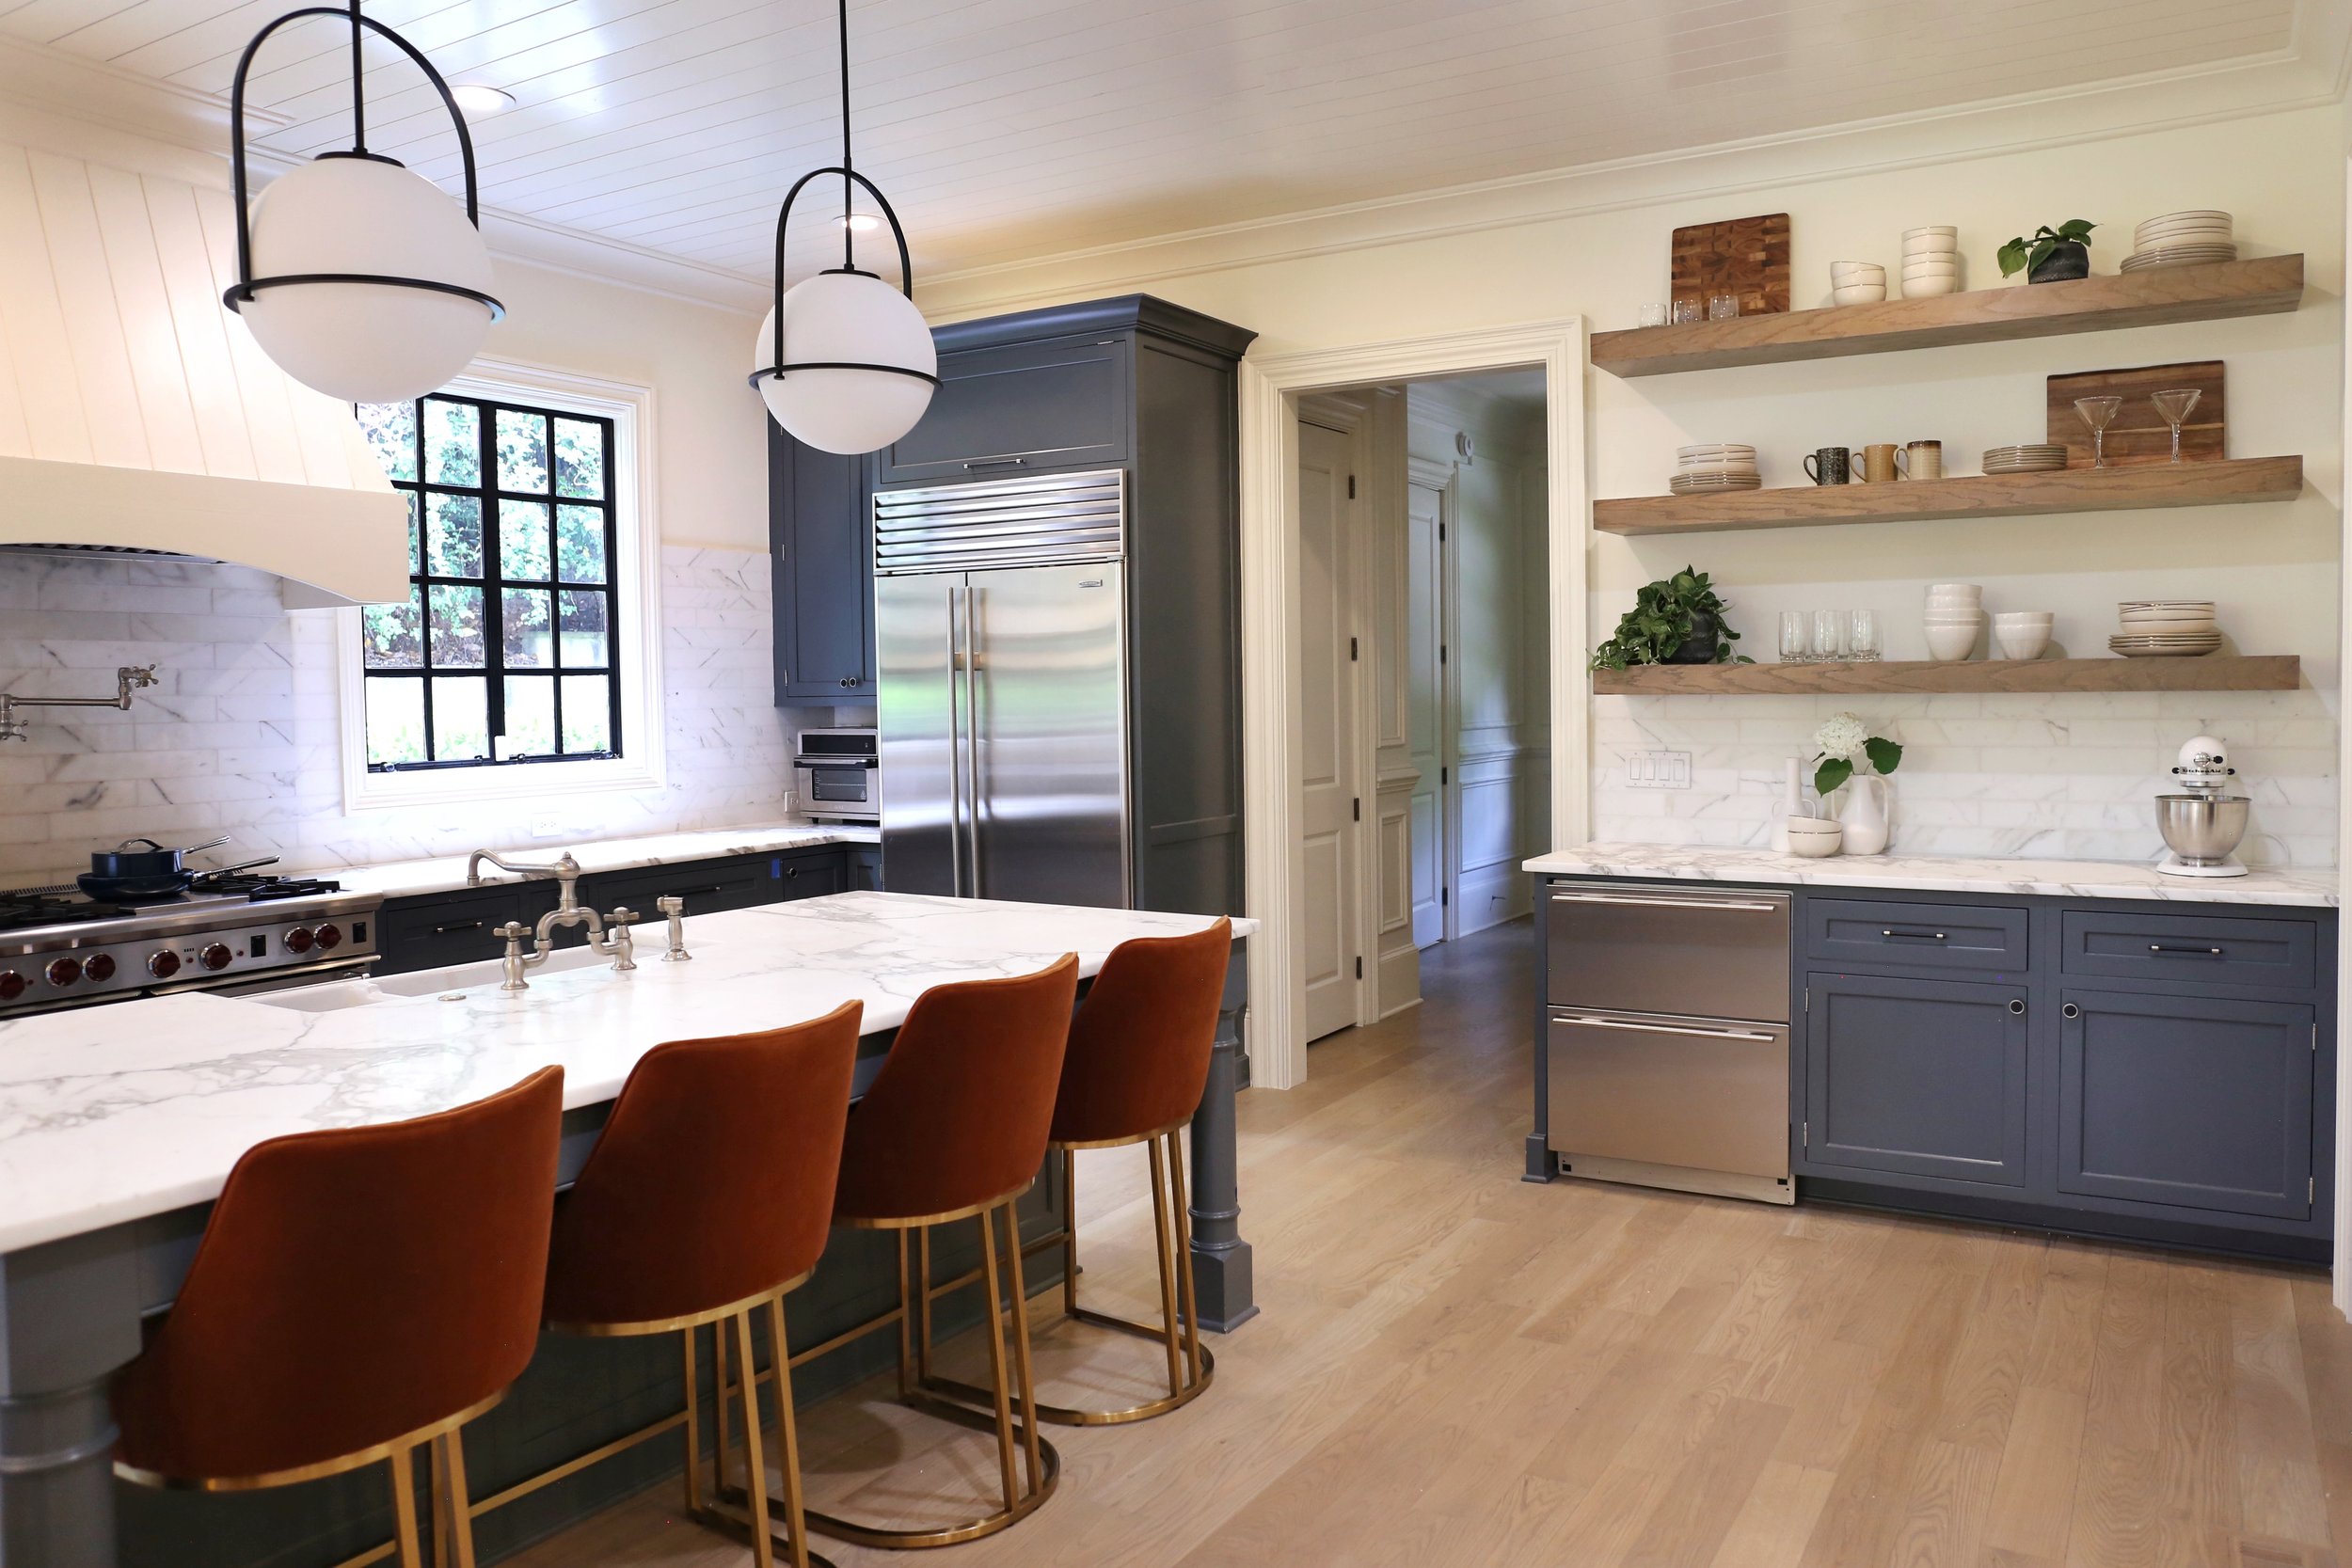
But let’s get in and talk about the design of this space. My client wanted an old world vintage Speakeasy-inspired basement kitchen and bar where he could effortlessly host friends and family. The bar area sits adjacent to the media room which hosts multiple movie nights and teenage hangouts throughout the week so the design and functionality needed to tie into that adjoining space as well.

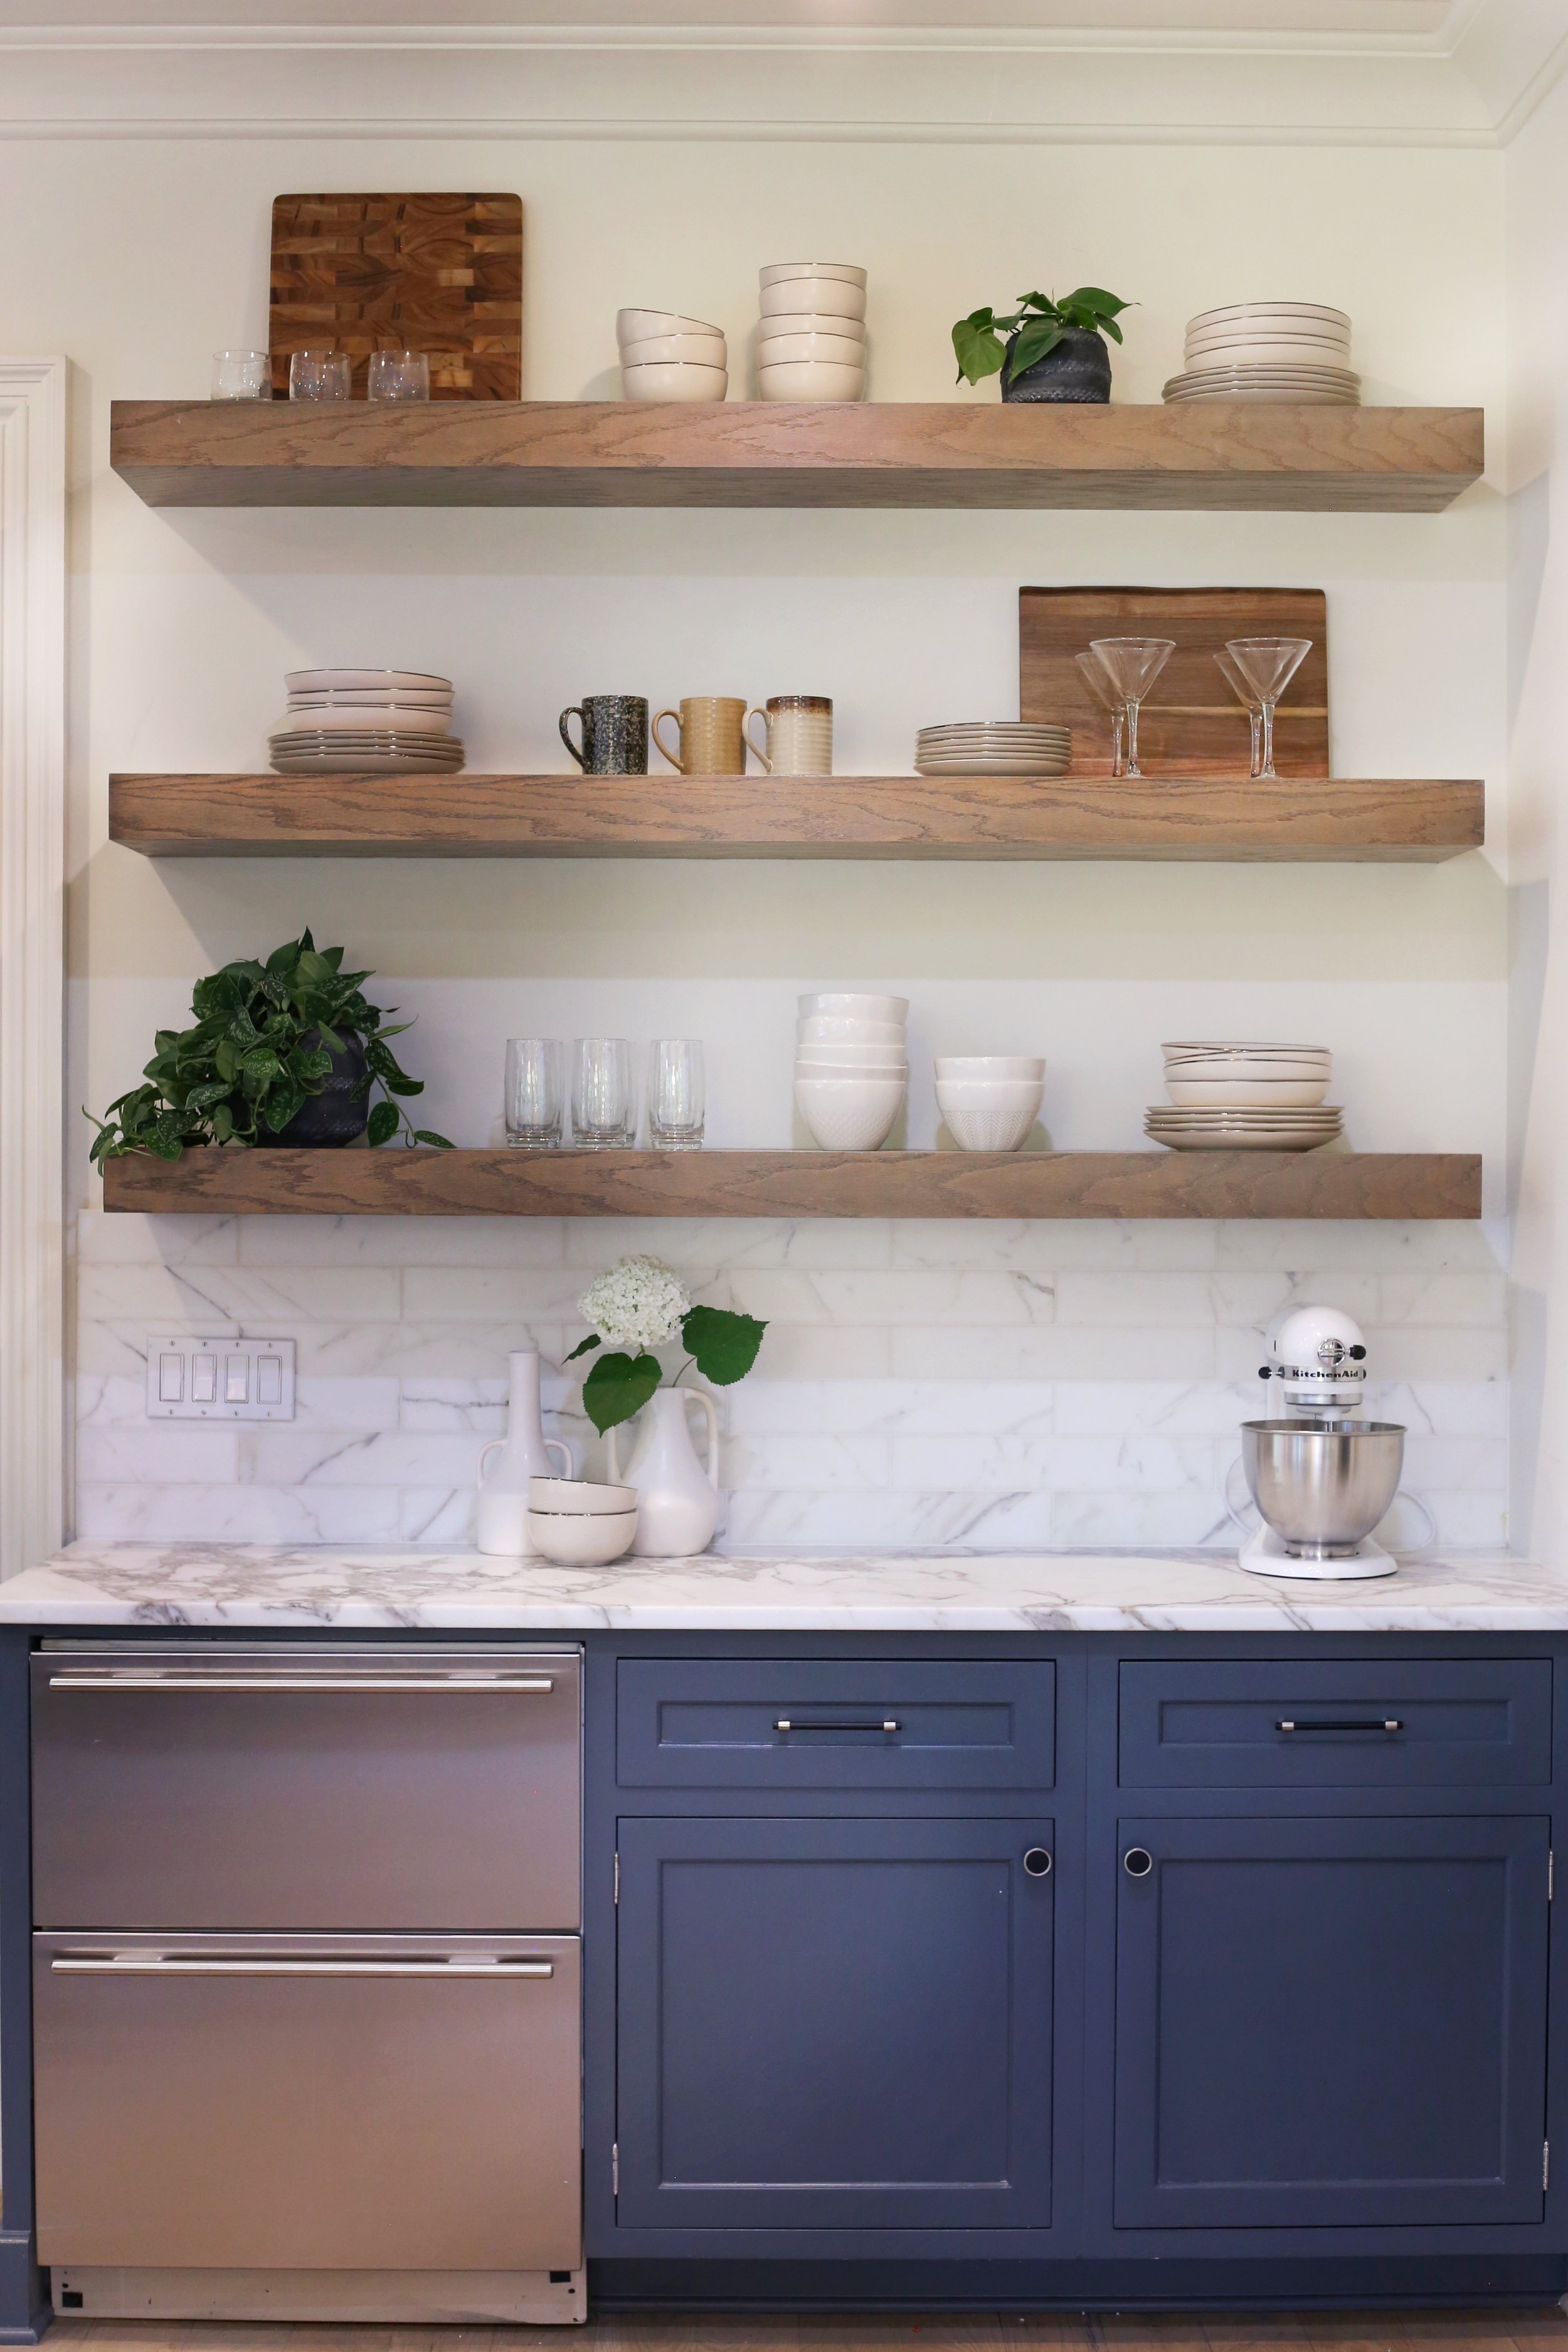
My goal for this space was to create a kitchen and bar that gave off a cool glamorous vintage vibe, but also felt accessible and not too uptight so to match the everyday family life of my client. I accomplished this by choosing structural elements in timeless materials such as marble and stone, and cabinetry in a classic shaker style in a warm wood tone, then adding in elements that were practical and family friendly for every day use.

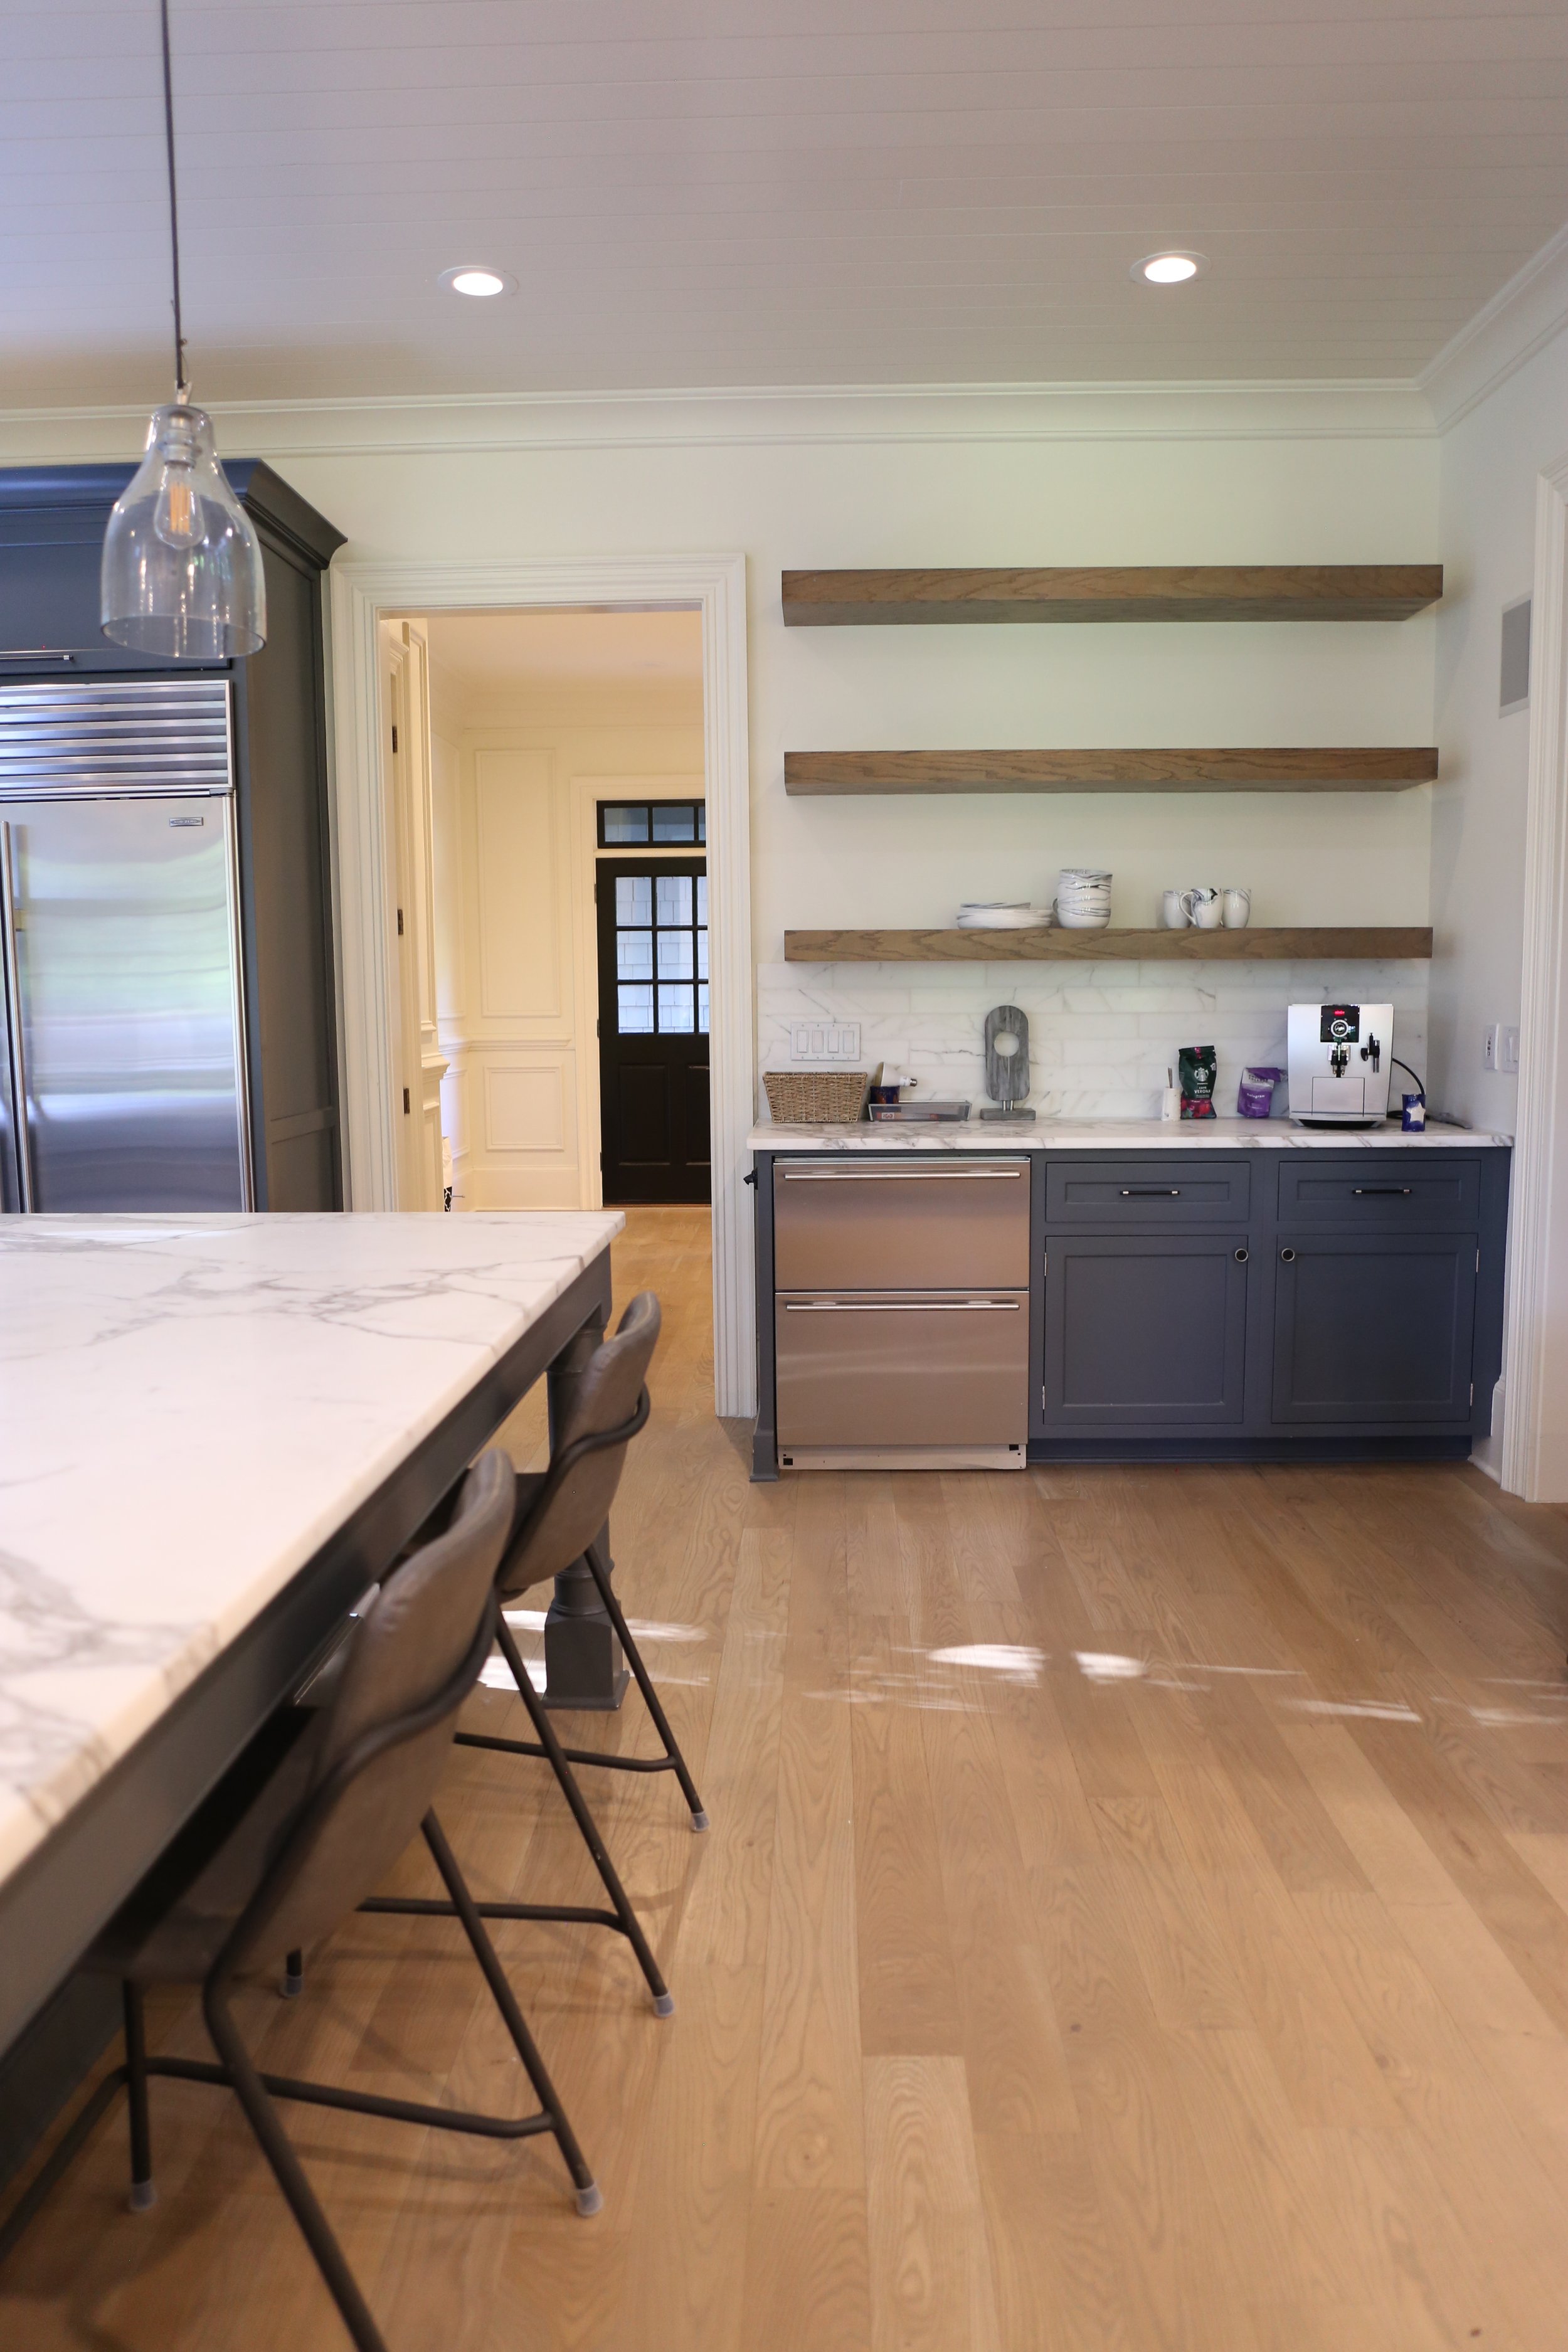
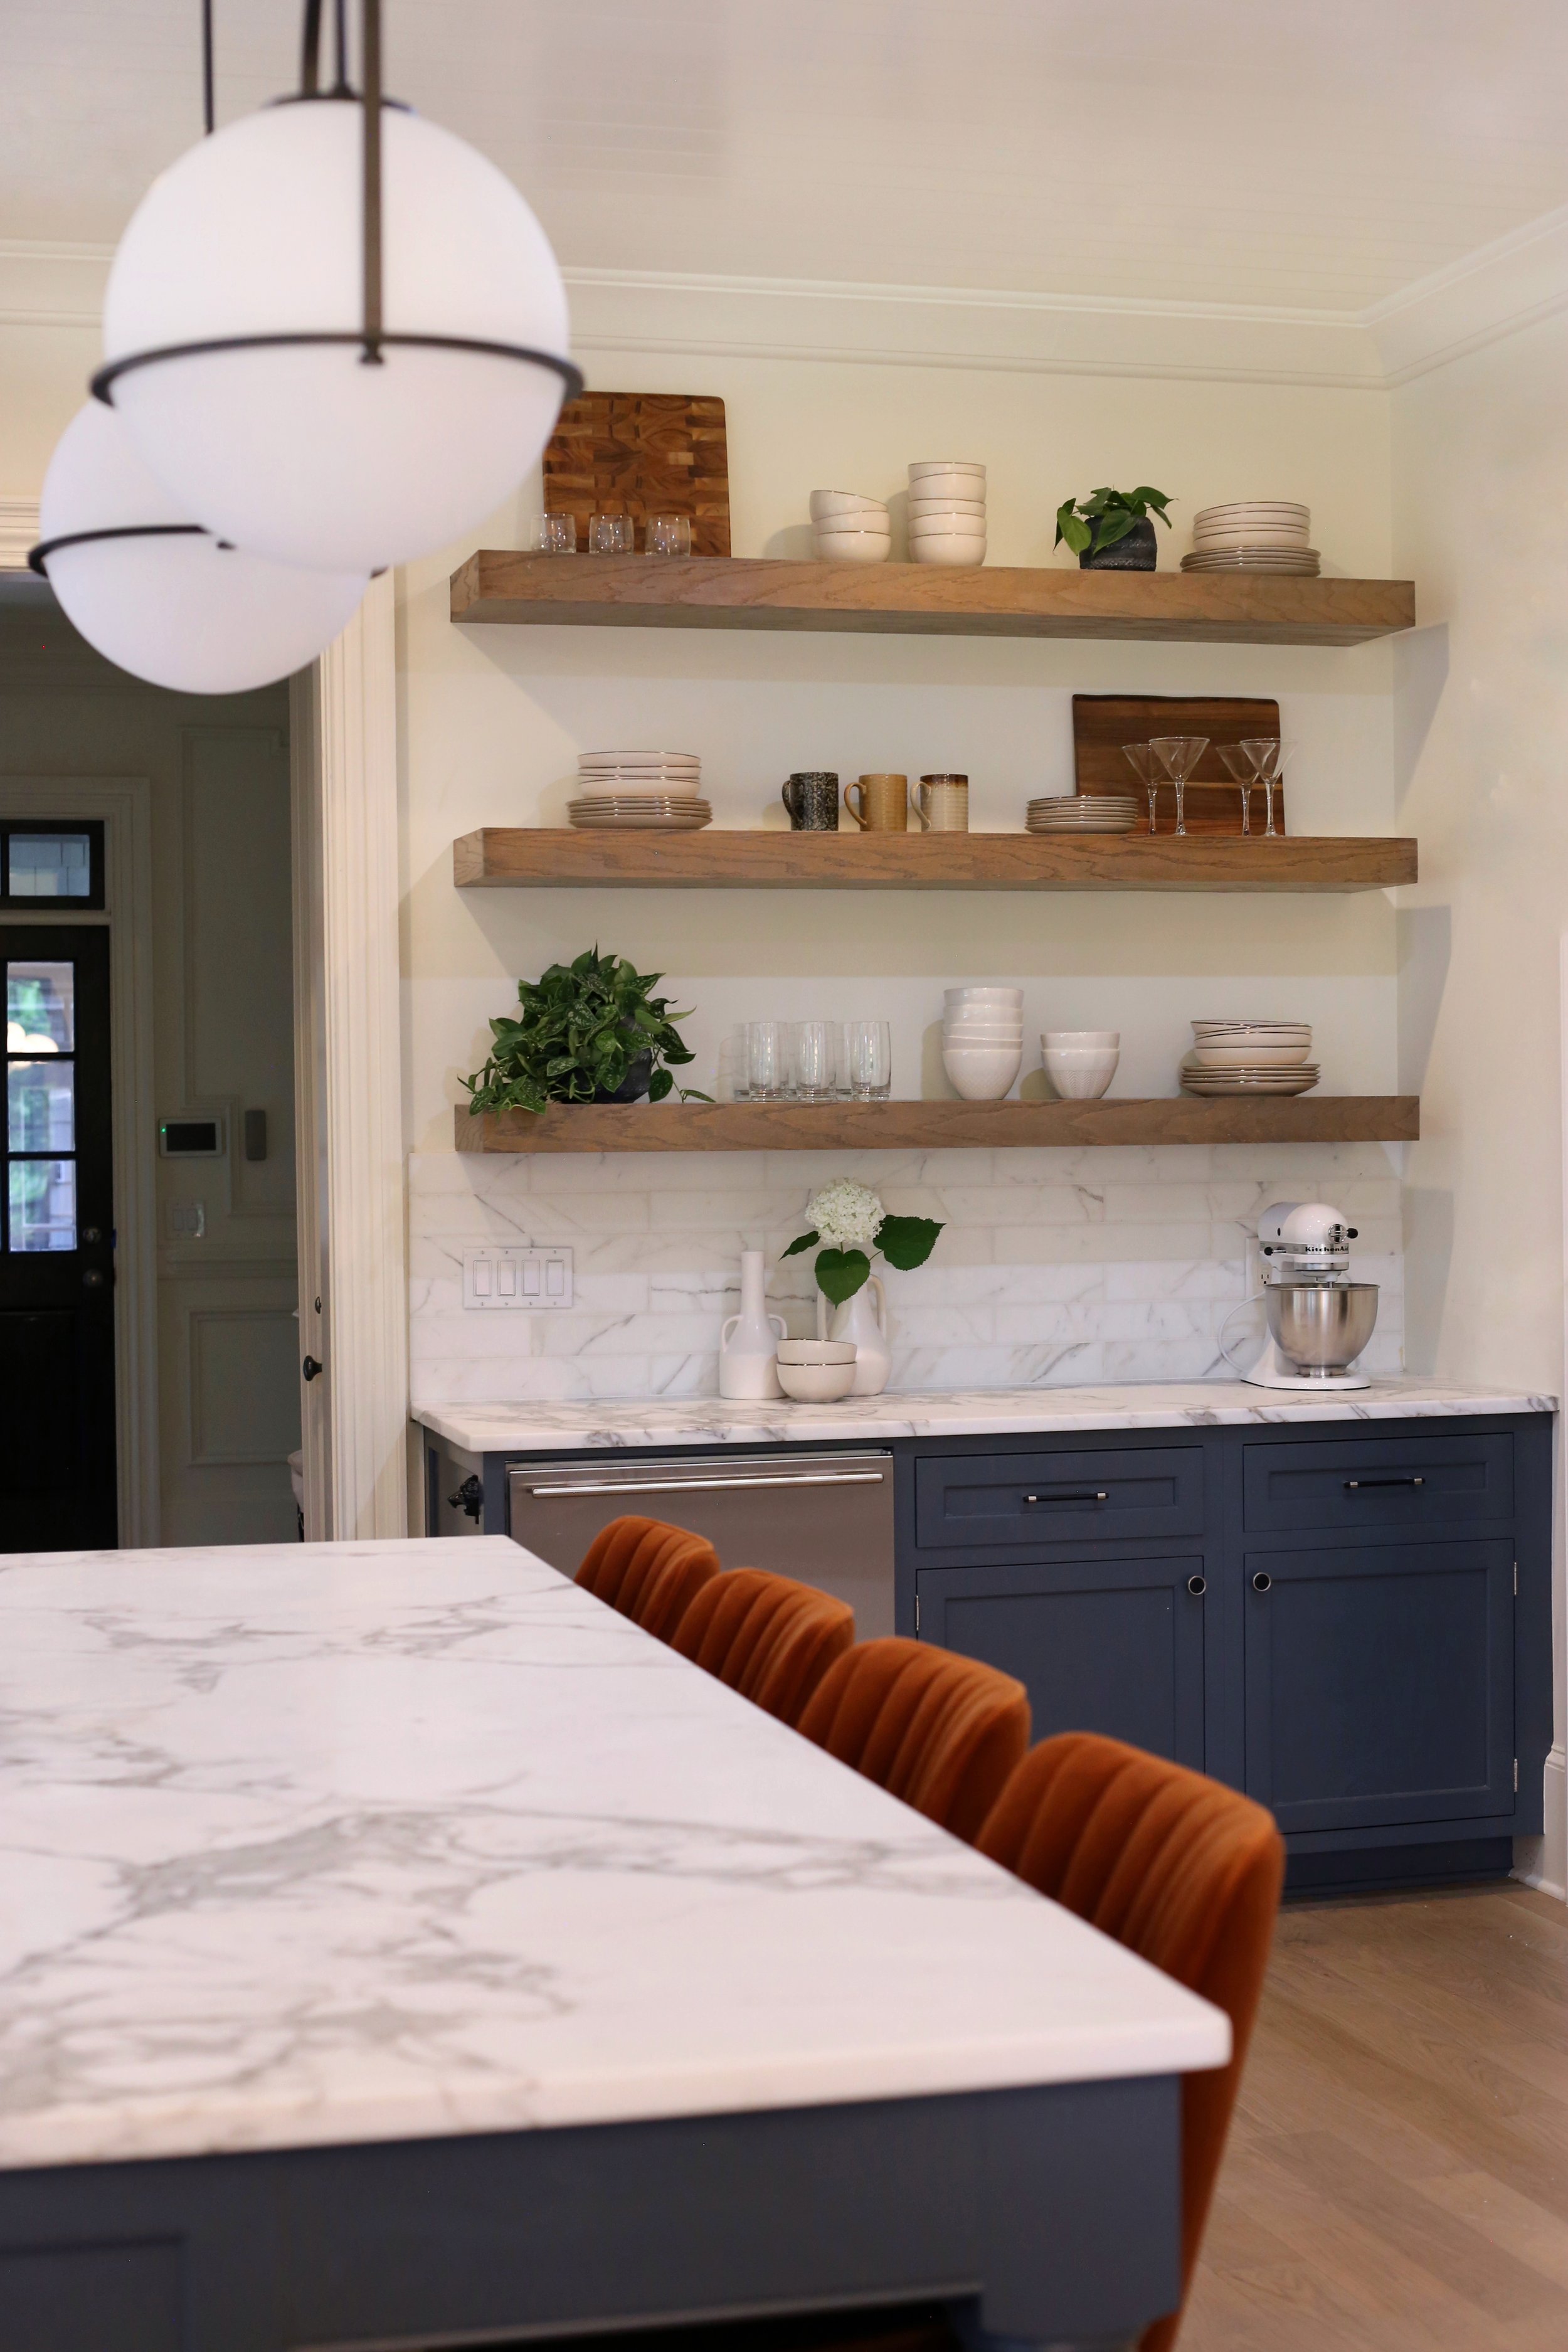
To outfit the bar I sat down with my computer and made a beeline to homedepot.com/decor Many people don’t realize the vast scope of products that The Home Depot carries, so they are often surprised when I share with them the products I find at The Home Depot, especially online. I love utilizing The Home Depot’s website when creating a space because they are truly a one stop shopping experience. In one afternoon I am able to source everything for my space, from furniture to lighting, to kitchenware and art, and have it delivered straight to my door in a matter of days. Everything I used to furnish and decorate this kitchen I found at The Home Depot.

I found these navy vegan barstools which are perfect for the space which needed a stool with a narrow base that could fit easily on the narrow tiled space under the bar. The stools are a full swivel which is perfect for anyone sitting at the bar to be able to turn around and see what is playing on the big screen directly behind them.

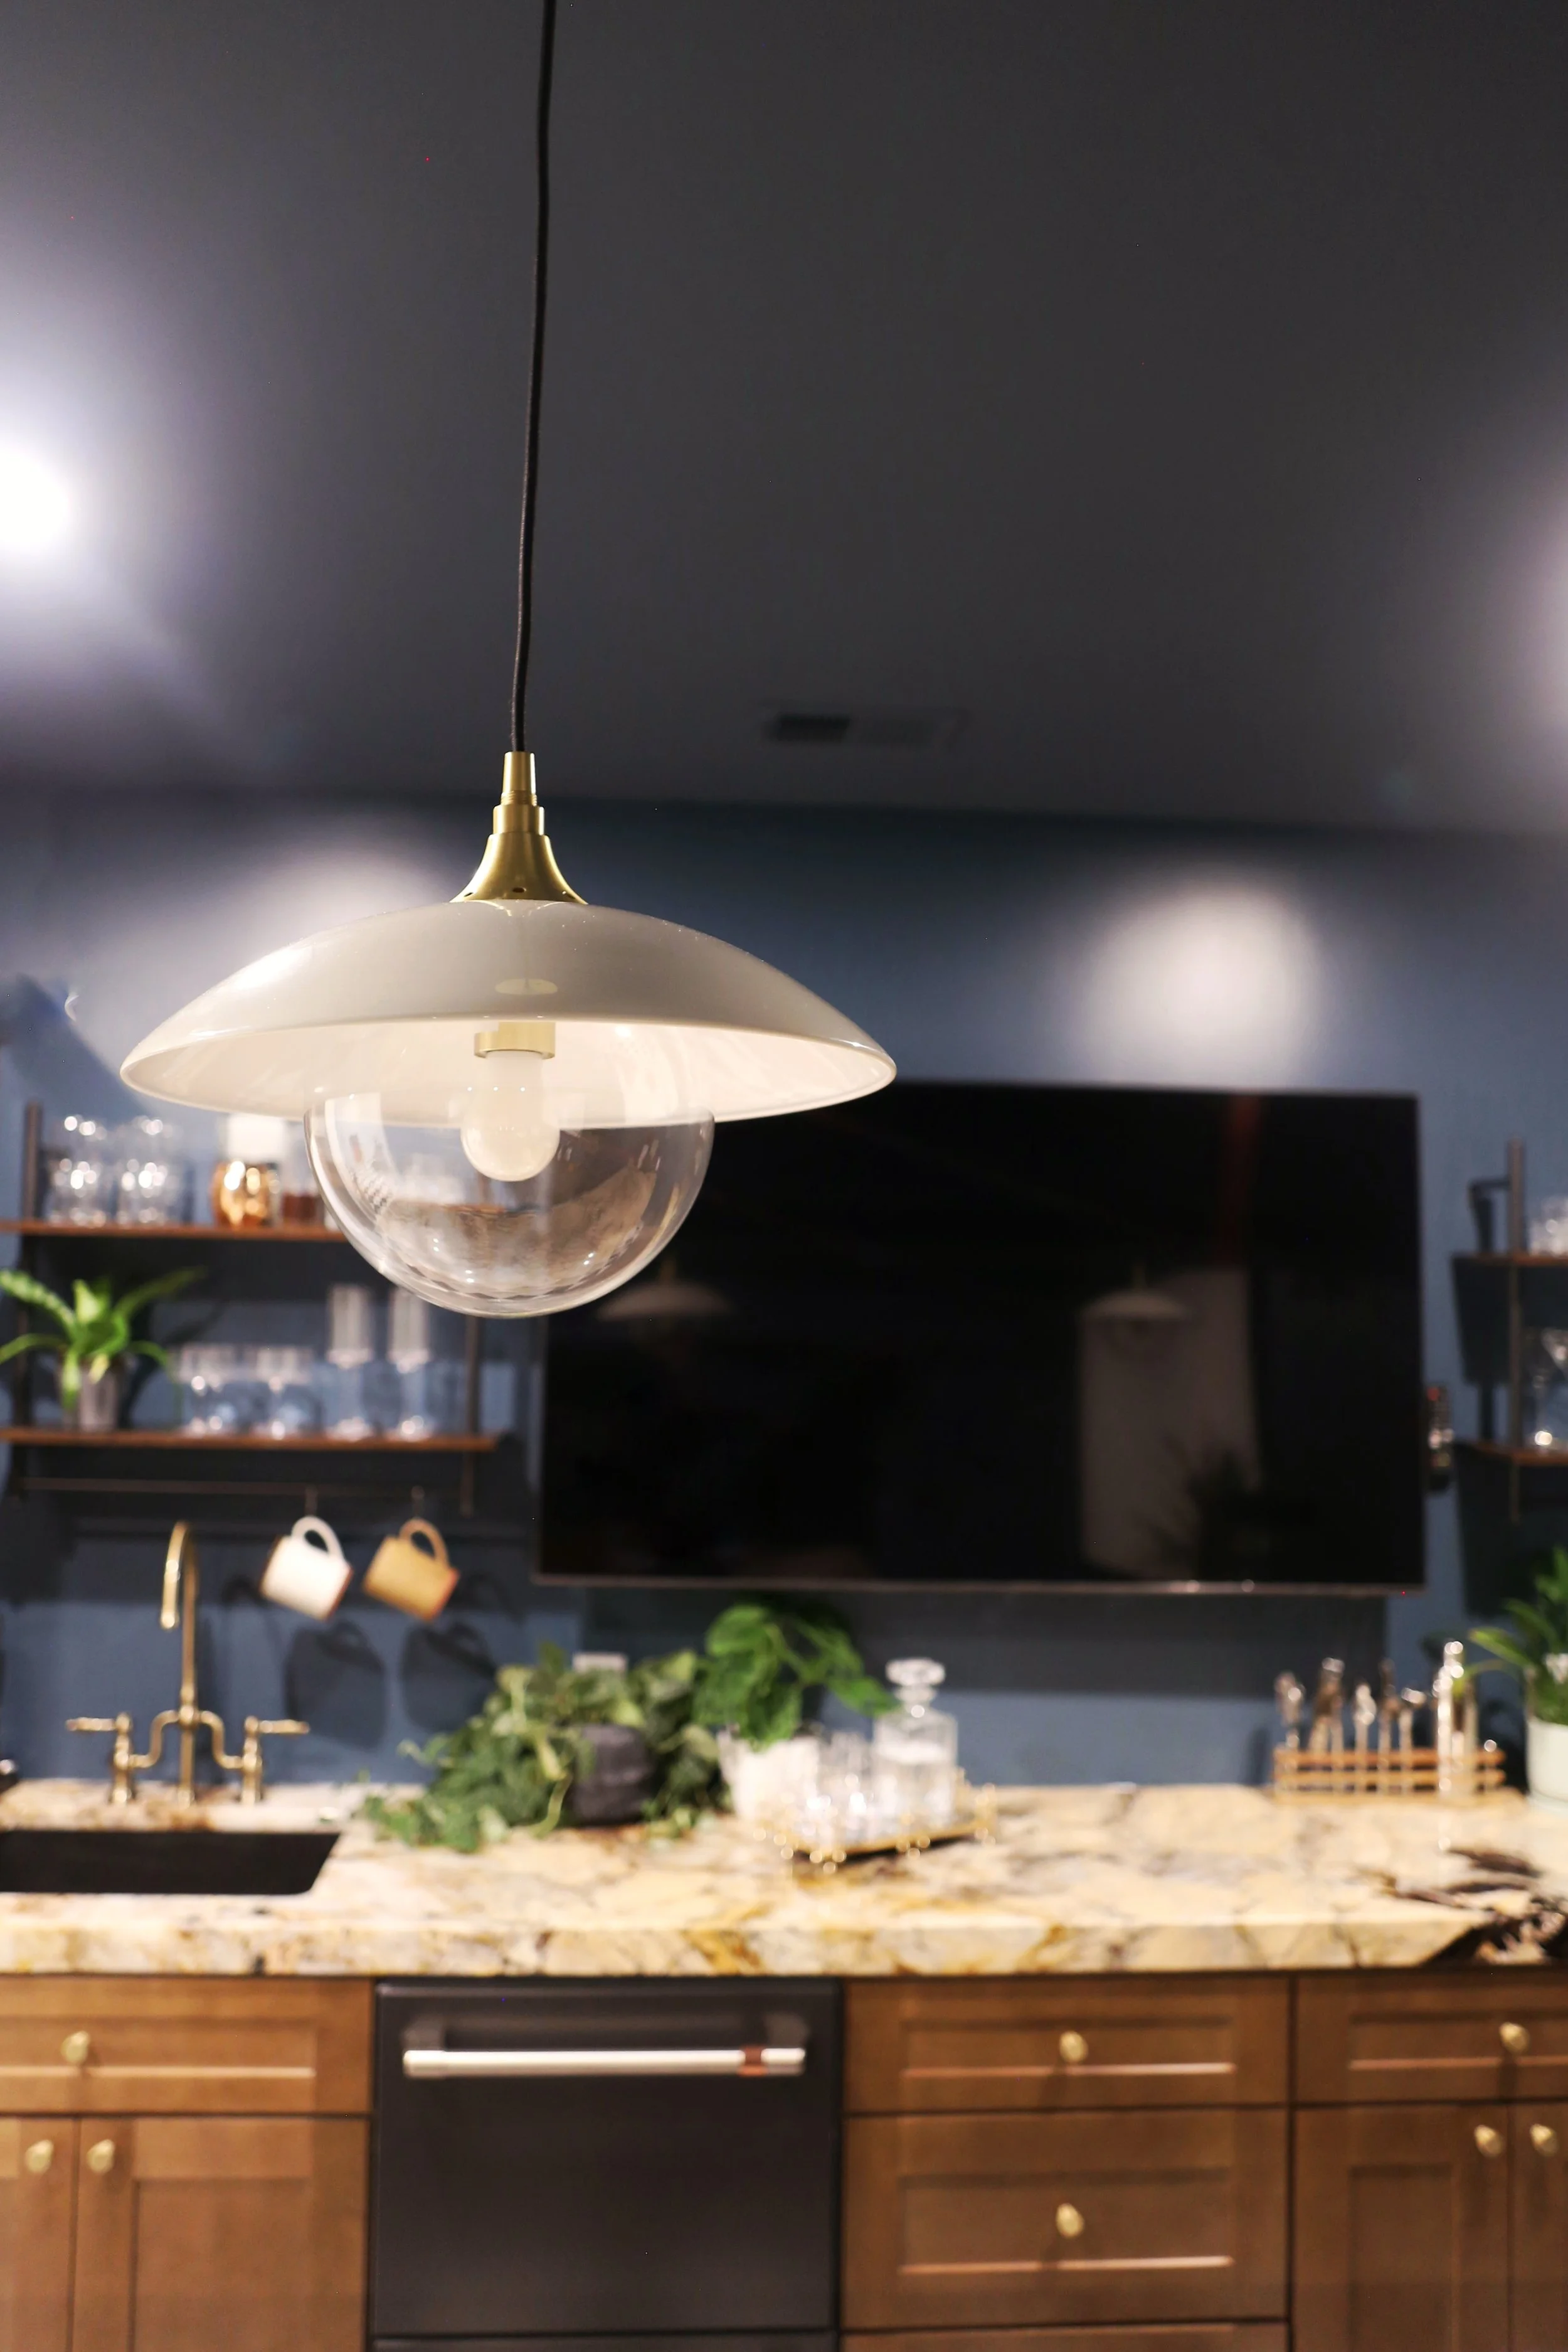
I found these beautiful vintage inspired pendant lights at The Home Depot. I loved how the white pops against the dark of the wall, and that the profile is slim enough not to obstruct the TV behind the bar not too much.

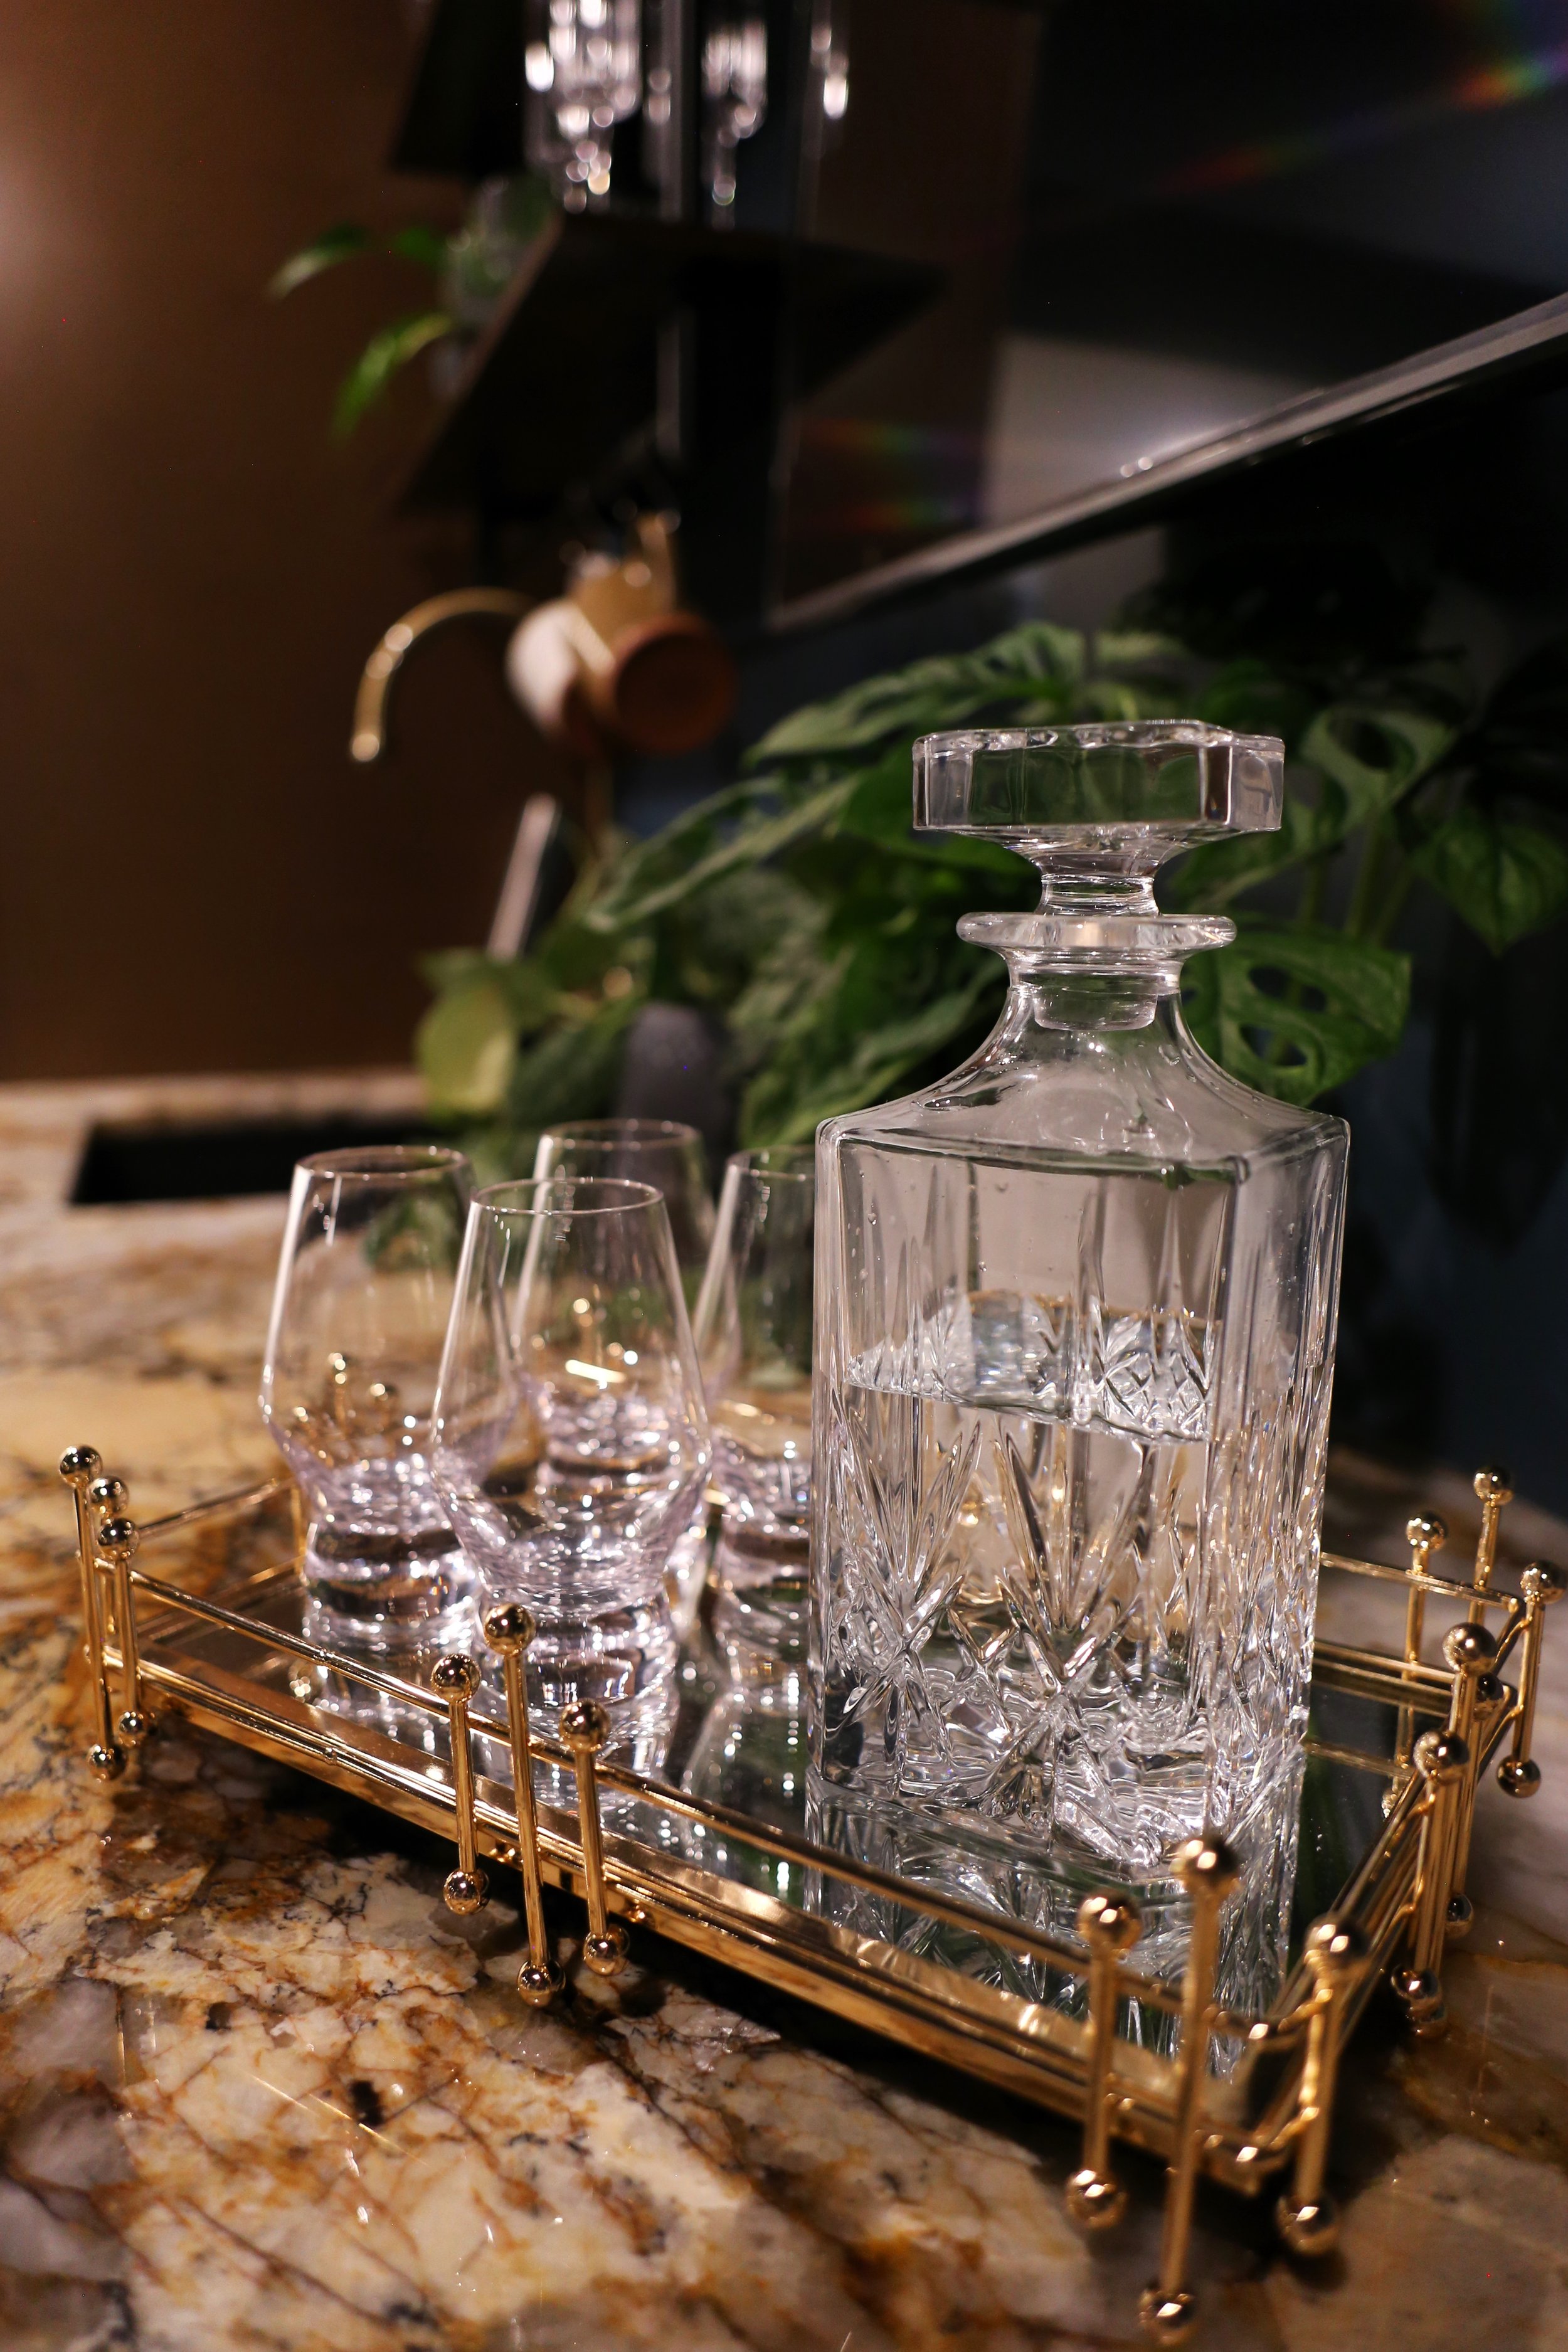
I’m a sucker for fluted stemware so when I found some on The Home Depot’s website I bought both the coupe and the champagne glasses for the basement bar. I was able to source all of the barware for the bar from The Home Depot, as well as sleek black dinnerware, stemware, and even a set of bone-inlayed bottle openers which I thought were beautiful and reminiscent of the homeowner’s trips to Kenya, a country very dear to his heart.

No kitchen bar is complete without its tools, so I also added in a mixer set, wine opener, cutting boards, and a sturdy knife set for the basement.

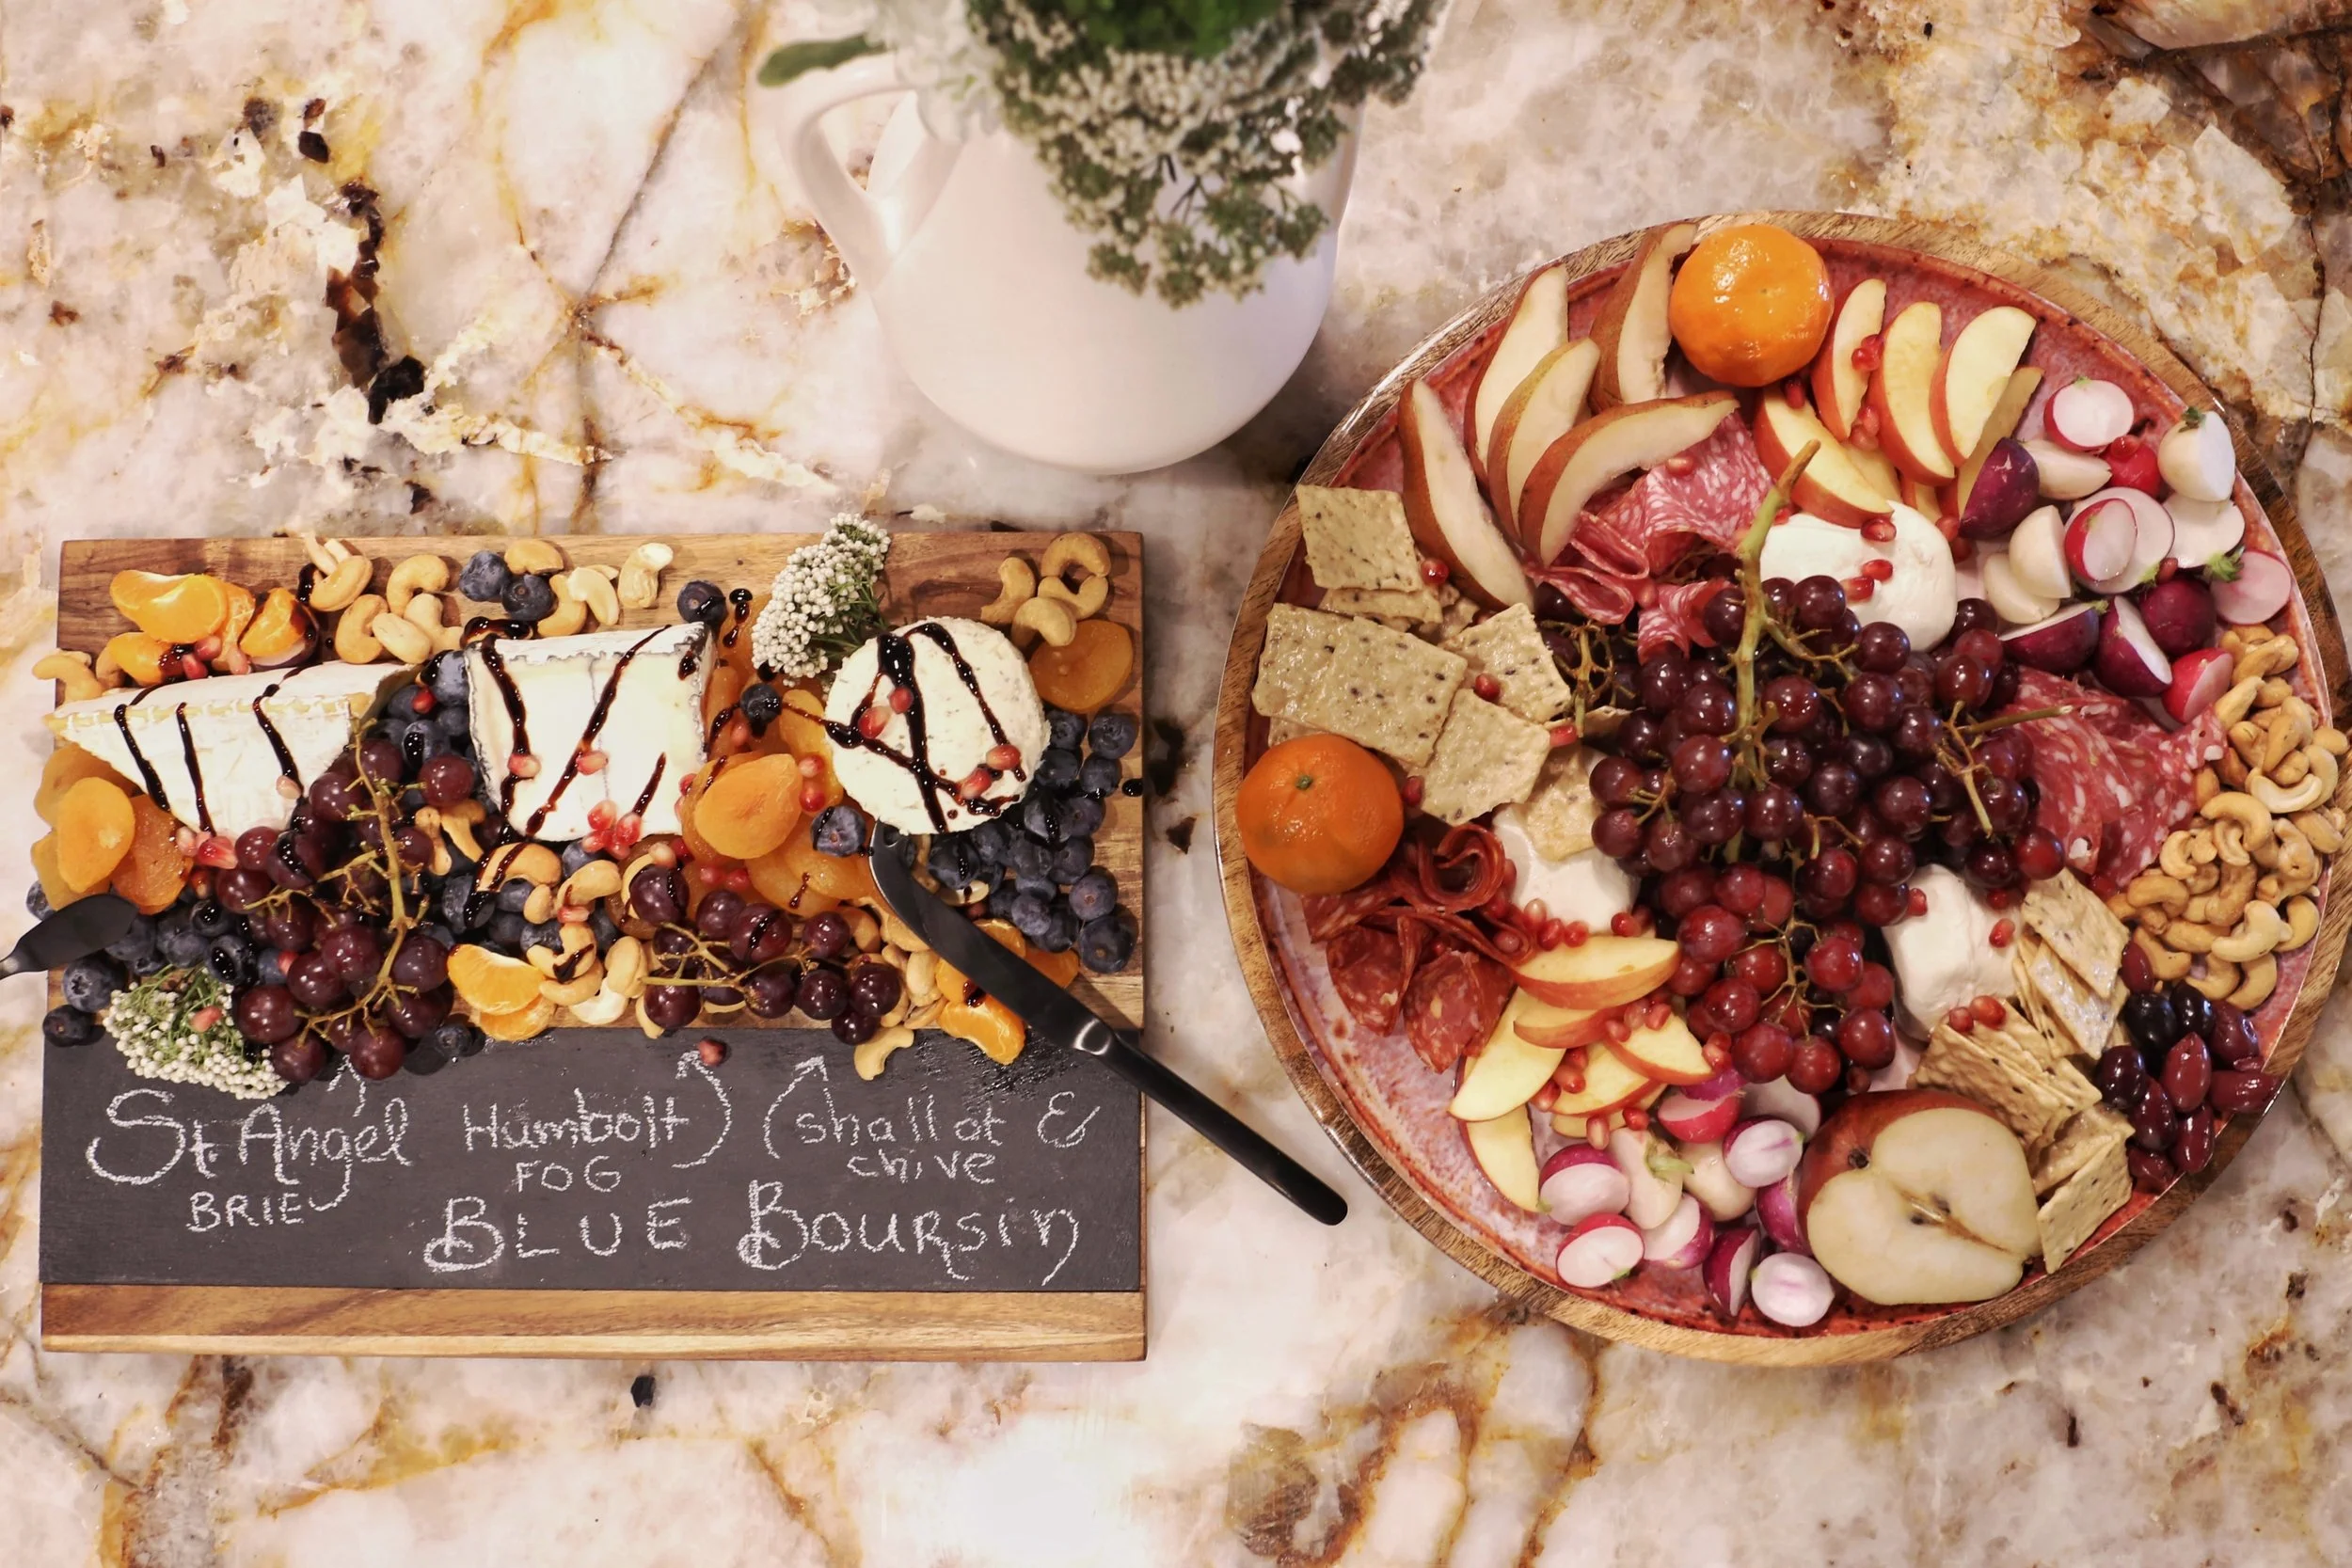
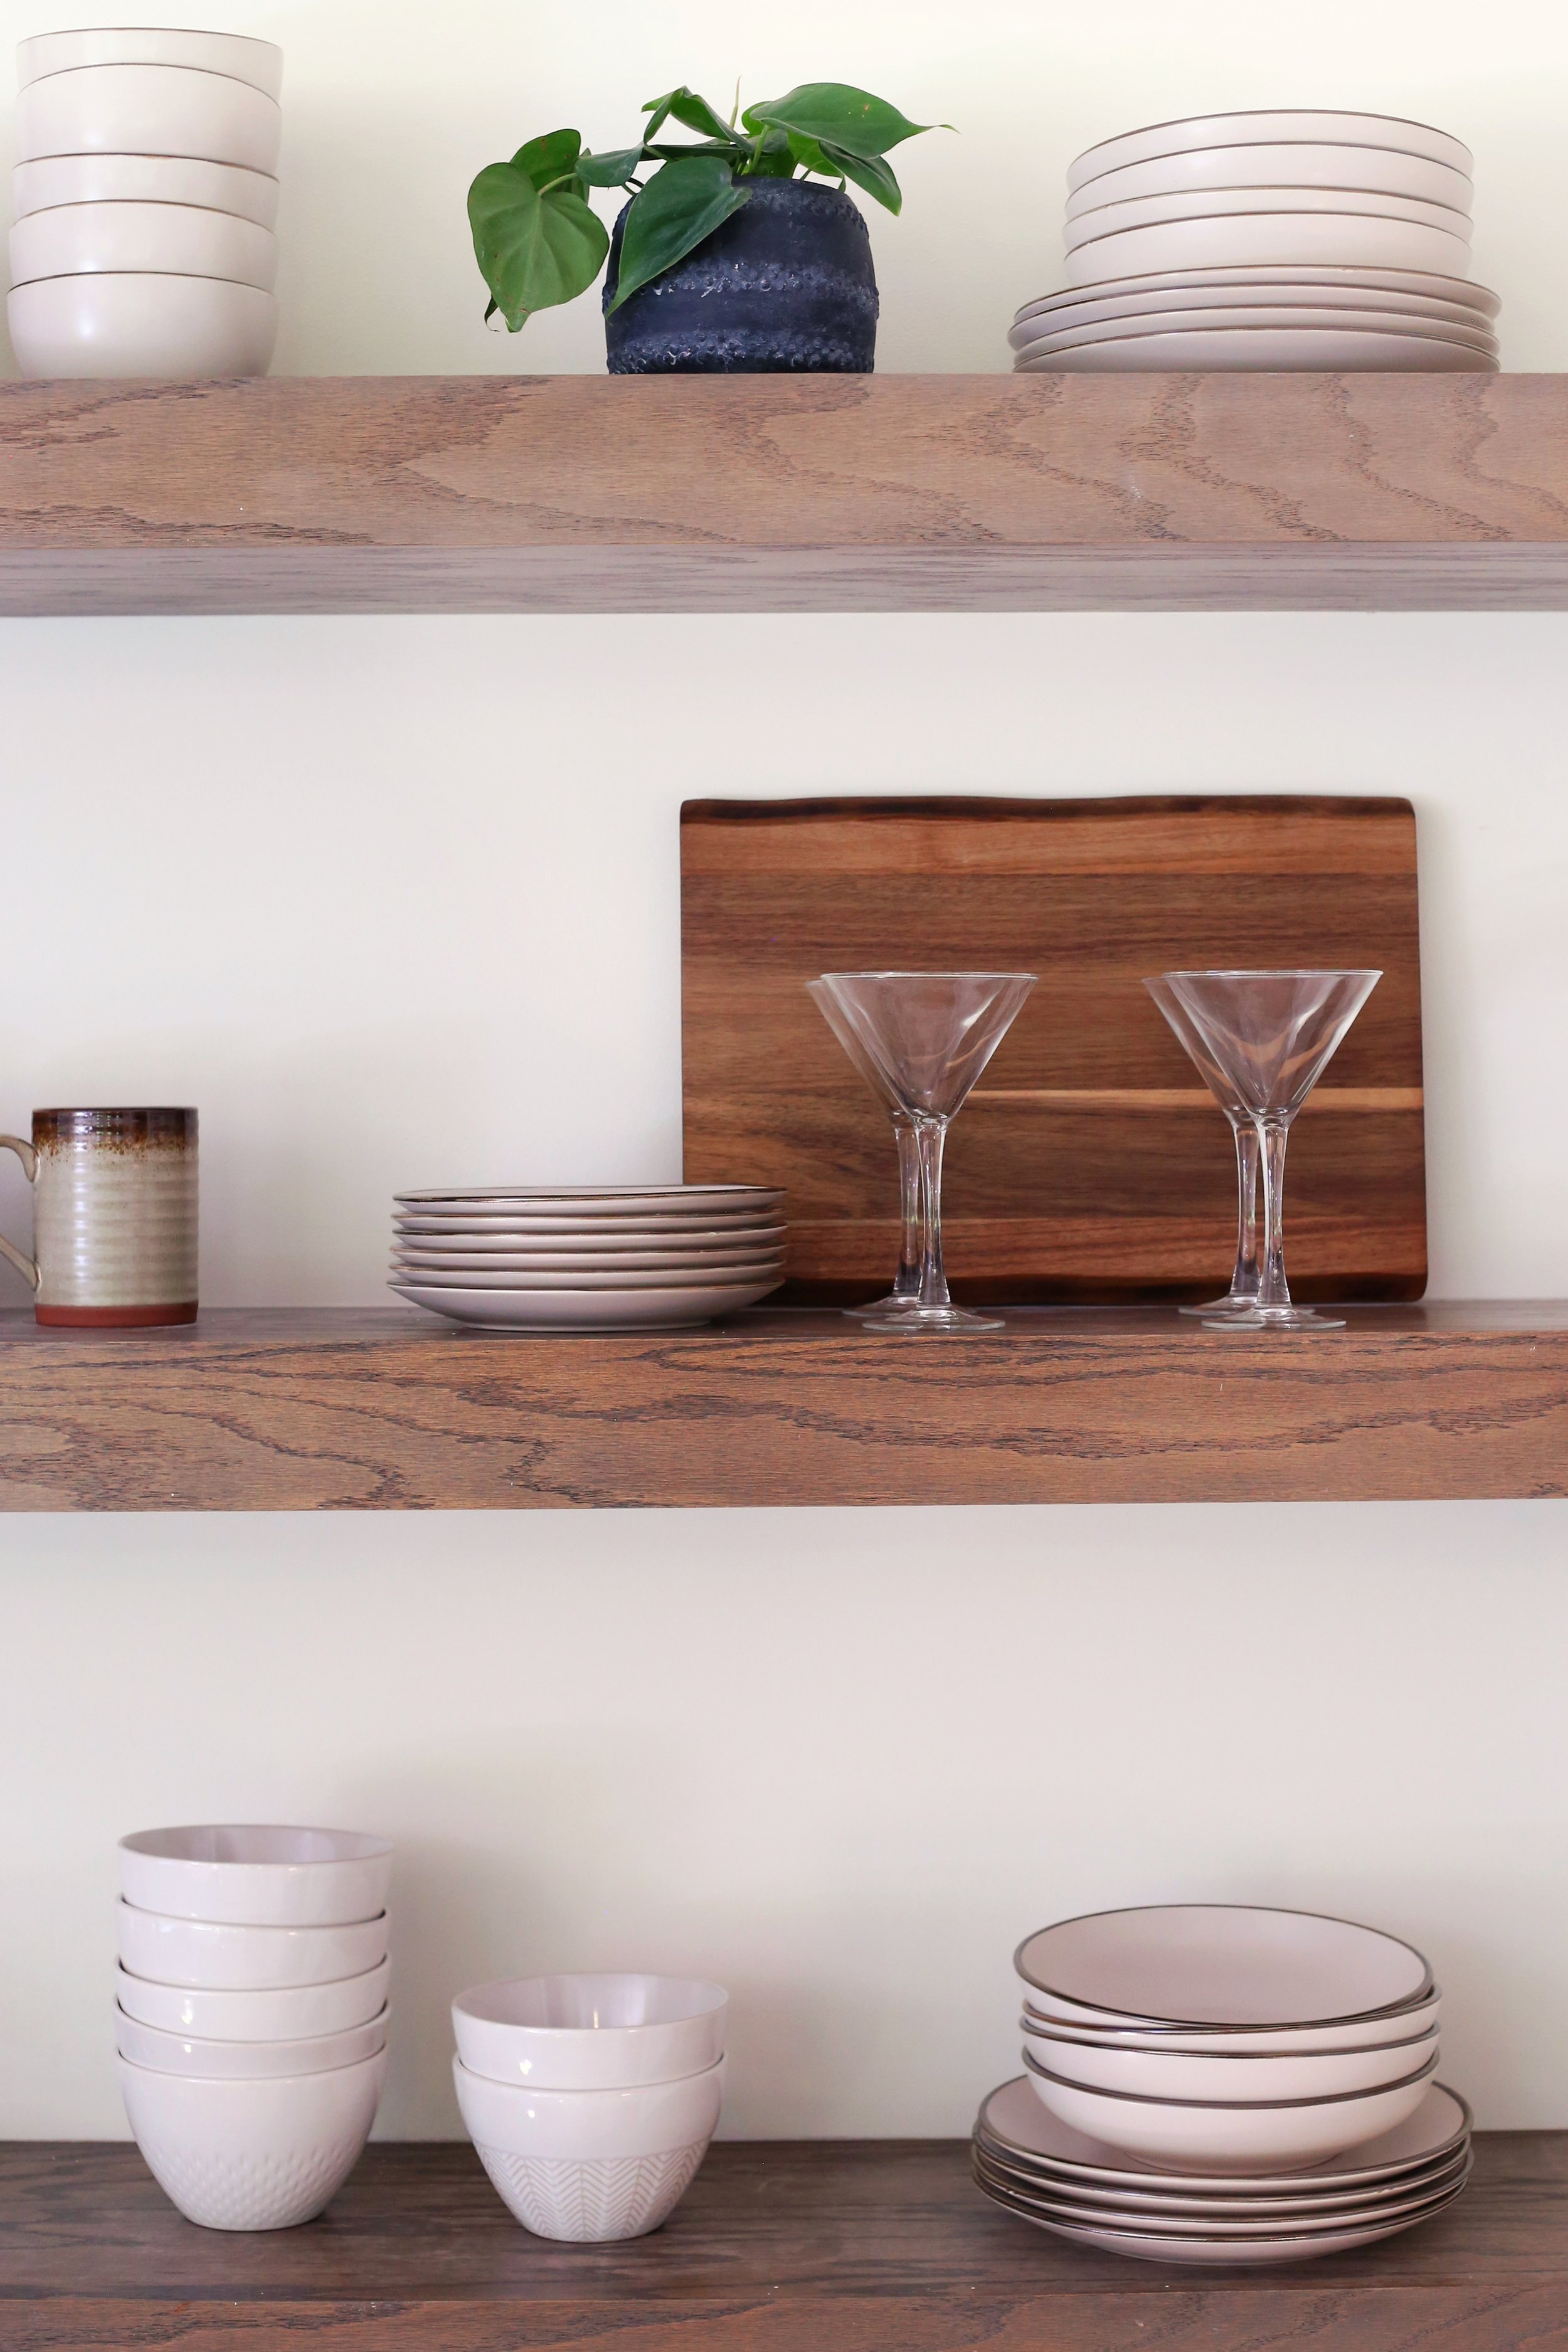
Once the basics were covered, I peppered in small details such as serving boards and floral vases  to create more character to the space while also allowing for easy and stylish hosting in a flash.   

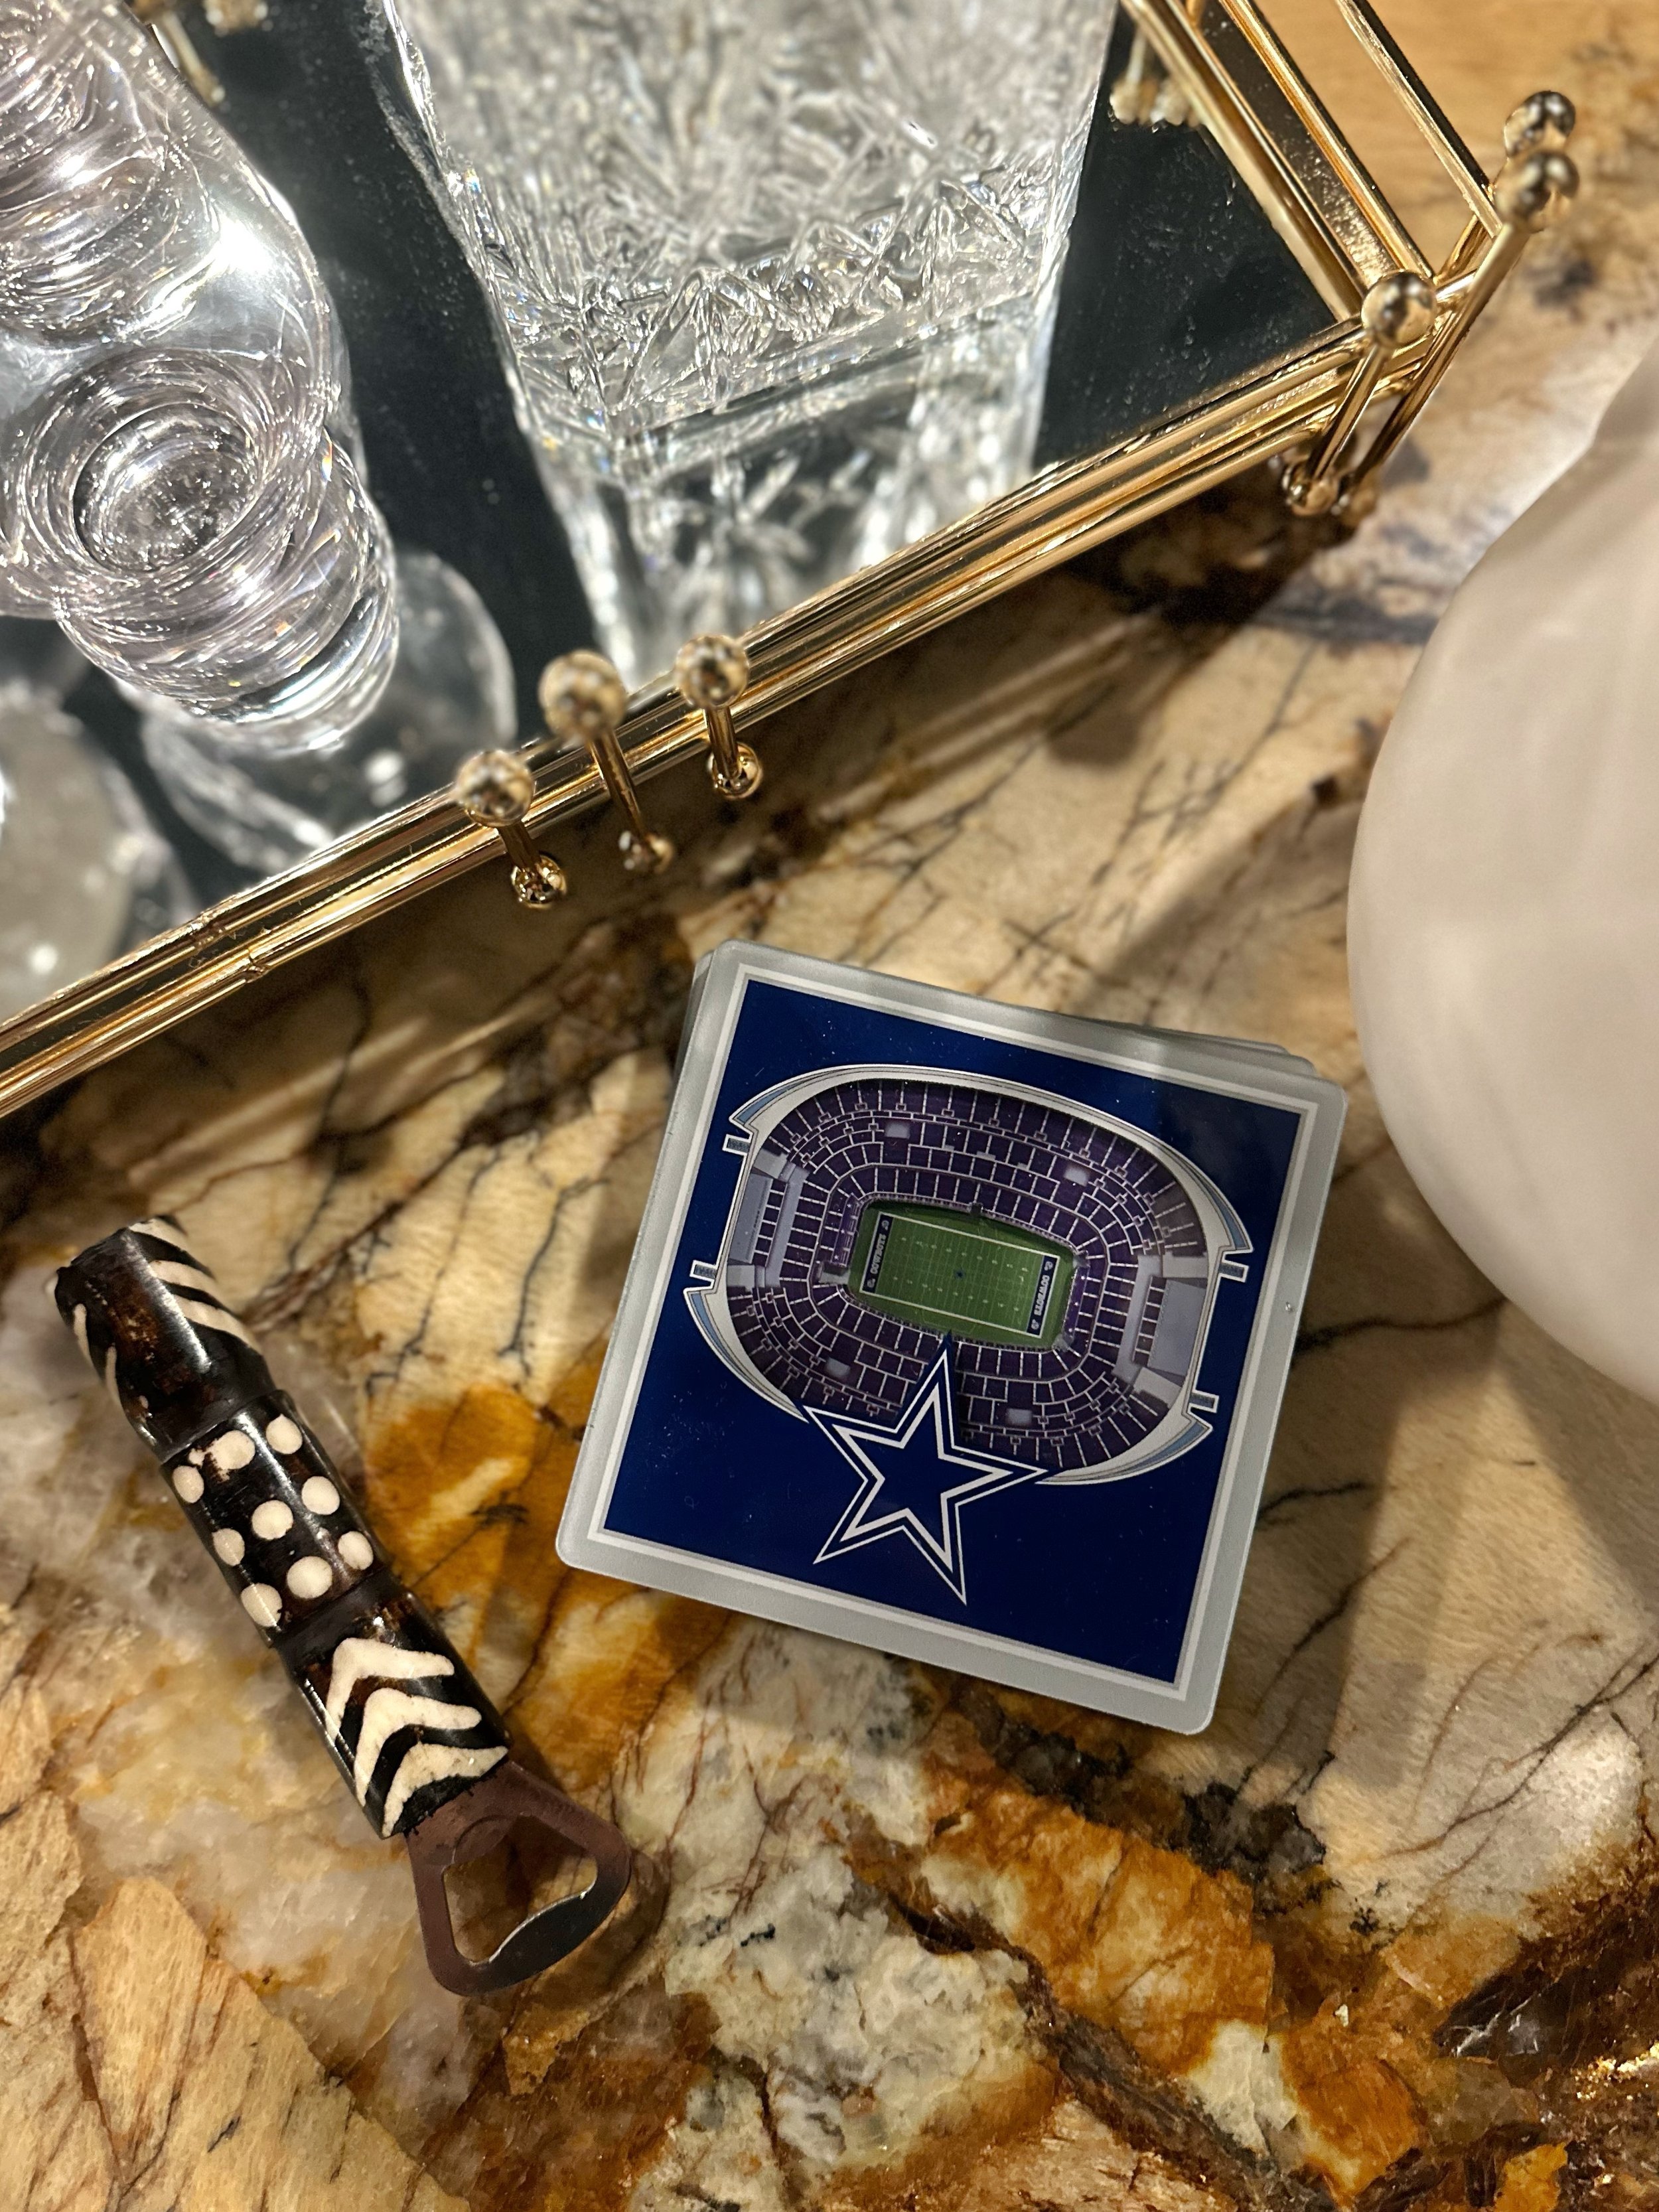
The homeowner is a diehard Dallas Cowboys fan so it was fun to surprise him with a nod to his Cowboys with these coasters I found online at The Home Depot (I’m telling you guys, The Home Depot has everything!).

I think everyone’s favorite part of this kitchen though, is the vintage inspired popcorn machine I surprised the family with. It perfectly to adds more old school style to the space in the basement, and it legit makes the best popcorn! This popcorn maker is used on the regular.


I am so pleased with how this basement kitchen bar  turned out! It is glamorous while also feeling accessible and fun, and perfectly fits the bill as a moody speakeasy inspired kitchen design.  I’ve linked all of the items I used for this space below, so you can check them out and get inspired to create your own dream space.

Dishes                Serving Ware           Decanter           Whiskey Glasses          Coupe Glasses

Mango Platter    Bar Set           Champagne Glasses   Charcoal Glasses         Beer Glasses

Vador Glasses   Bar Stool             Popcorn Machine    White Pendant         Bottle Opener

Woodland Wine Glass                  Mirrored Trey

A Kitchen Makeover With The Home Depot

In Paid Partnership with The Home Depot

If there is one area of the home that should feel inviting and welcoming, it’s the kitchen. The kitchen is often a buzz of activity. It’s the place for kids to pull up a stool and complete homework, chatting about their day to the parent prepping dinner, or the place to gather for a late night snack, sharing intimate parts of the day in hushed tones. It’s the source of nourishment for the family and a place to host friends and neighbors. This is why I feel it is so important to take special care when designing a kitchen. My goal when designing a kitchen is always to create a homey and relaxed feel, with design that inspires and draws you into the space.

A friend recently asked for help in giving their kitchen a makeover and I happily took on the challenge. The kitchen itself was already beautiful and didn’t need much to make it shine except for updating a few small pieces which felt dated, and filling it with decor that helped the room feel lived in and welcoming.

I sourced everything I needed for this kitchen refresh at The Home Depot.
The Home Depot has quickly become my go to spot when sourcing lighting, furniture, kitchenware, and even decor. I was able to find everything I needed online with their one- stop shopping experience, and the items were shipped to my door at lighting speed. This is a welcome relief instead of ordering from multiple stores with multiple shipping solutions and dates.

My main focus was to fill the open shelving with useful kitchen items and add a few decorative pieces to make the area shine. I also wanted to update the kitchen island in order to bring some style into the space.
There is not a lot of cabinet storage in the kitchen, so I knew whichever pieces I chose to fill the shelves needed to be practical yet aesthetically pleasing as they would be on display.

I choose a selection of tableware from Stylewell and Home Decorators Collection, two of The Home Depot’s exclusive brands which offer incredible quality at an affordable price point.

I selected dinnerware in a warm taupe and metallic edging, giving it a sophisticated look while also being practical as it is completely dishwasher and microwave safe
I choose bowls with etched details, and a selection earth toned mugs that give the design of the shelves a warm feel.

Filling a large area of open shelving can seem intimidating, but it doesn’t have to be hard. Here are a few tips; Display items of the same look or category in groups of three, then stagger these groups across your design. This will give visual balance to your design. It’s also always a good idea to incorporate living plants or fresh flowers to liven up the space. In this case, the terracotta planters also serve as part of the design element, bringing even more texture and style to the space. Lastly, don’t forget to have fun and remember that design is always a process. If you style in one way but then decide the next day that you’d rather see it a different way, no big deal. It’s ok to switch things up over time.

For the bar area, I replaced the dated pendant lights with two oversized vintage inspired globe pendants, then replaced the current barstools with elevated plush velvet stools in a rich rust tone, offset by brushed bronze legs. These simple changes immediately updated the room and took it from feeling a little drab to exuding a time tested elegance full of character and warmth.

Lastly, I added some useful small appliances to help make this family of five’s day to day life a little easier. It was important for me that these elements fit the style aesthetic of the kitchen as well, so I kept design in mind when selecting each item.

I added a white KitchenAide mixer which blends effortlessly in the kitchen when on display and not in use.
For cookware, I went with Caraway Home’s non-stick pots and pans. I love this line for its quality and thoughtful design and also its range of colors. I ordered a set in Navy to match the kitchen cabinets.

Of course I had to bring in an AirFryer as well because AirFryer’s are making all of our lives easier right now. I chose one that was large enough to cook an entire chicken in if desired, but also the right size to slip under the kitchen cabinets discreetly when not in use.

I had so much fun giving this kitchen a facelift. The updates weren’t enormous, yet the impact feels massive. The room was pretty already, but just by switching out a few key items it really all came to life.

Items I used in this makeover

A Bedroom Makeover Just in Time for the Holidays

In paid partnership with the home depot

I’ve been feeling the nudge to update my daughter’s bedroom for awhile now. The current space wasn’t working for my almost High School graduate and the needs of a brand new young adult.  For starters, it held two twin sized beds which just wasn’t cutting it anymore for her adult sized self. No longer being in the season of sleepers meant that replacing the other twin bed with a desk for her mounting school responsibilities would make so much more sense for her space.

Beyond the function of her room, I felt the design could use a little grown up flare as well. I had recently made over my bathroom, decor, and all, utilizing products from the Home Depot, with great success, so I decided to do the same for my daughter's bedroom makeover. I hopped on the Home Depot website and had quite literally the one stop shopping experience. From quality furniture, bedding, decor items, and everything in between, the Home Depot had it all. I even ordered a selection of  Holiday themed decor to get us in the holiday spirit.

Most important to me in this makeover was to replace my daughter's somewhat lightweight twin bed frame with a sturdy Queen size bed. I found this elegant Ashdale Patina Queen bed in ivory, perfectly fitted for my daughter. I love its understated curves and the soft grey upholstery that ties so fittingly in with the wall behind it. I ordered the Linenspa 10 inch mattress from the Home Depot to complete it. I also found a gorgeous carved bedside table with drawers to replace the vintage wicker table she currently was using. This offered some much needed storage in her room.

The Home Depot carries the softest Holiday flannel bedding, and I couldn’t help myself but order some for the bedroom. I went with a mix-matched selection so I could layer different colors and patterns in coordinating colors.

The next priority was to add a workspace to her room. By removing one of the twin beds I had a bit of extra space to add a desk. With the limited space, I knew I needed a compact desk I could tuck into the corner of the room without obstructing the flow of the bedroom. This small Stylewell desk In light grey was the perfect size for the corner and blended in easily with the rest of the room decor. I found the sweetest swivel office chair in a teal blue which is insanely comfortable. It makes the perfect addition to the room.

One exciting fact I recently discovered is that the Home Depot carries a number of copycat items from popular home decor brands but at a fraction of the cost. I couldn’t believe my eyes when I found this mirror, a knock-off of one I have loved for ages but whose original price was very much outside my budget. Of course I had to order it, and think it makes the most perfect statement piece in my daughter's bedroom.

The ceiling light in my daughter's bedroom was a rickety fan/light combo original to our 1980’s house. The Home Depot has an amazing selection of lighting, and I ordered an affordable Sputnik chandelier to replace the old fan lighting.

Lastly I sprinkled the room with a little Holiday cheer. The prelit Christmas trees add sparkle and shine to her bedroom. A wreath hung on the wall and greenery sprinkled throughout anticipate the upcoming Holiday season. The North Pole pillow and the flannel plaid throw blanket add some festivities to the bed.

I even found the softest Holiday flannel  Pajama’s and couldn’t resist ordering some for kid sister. We are all feeling ready for the Holidays over here thanks to the Home Depot.


Don’t forget to check out the Home Depot next time you are shopping for all things home. They have more selection than you probably realize, with both excellent quality and price points!

I’ve linked all the products I used in the room below.

Queen Bed Desk Office Chair Wall Mirror Duvet Cover

Mattress Flat Sheet Fitted Sheet Grey Flannel Pillowcase

Holiday Throw     North Pole Pillow Wreath Greenery Prelit Christmas Tree

Red Flannel Pillowcase Sputnik Light Bedside Table

Renter friendly bathroom makeover

In paid partnership with The Home Depot

It’s Summertime, which means a flurry of activity in the Bond home. During the Summer, much of my time is spent carting kids to their various activities, planning events to keep everyone occupied, or being the designated neighborhood kid host home with a front door ever swinging on its hinges.

I did find the time to sneak in a few projects as I juggled the business of parenting four kids over Summer Break as a single Mom. One of these was a project I’ve been excited to get into for months, my personal bathroom.

This bathroom is the final room in my home to be renovated. I had completed a couple of smaller projects in the space earlier this year. First was to pull out the plastic shower surround and tile a walk-in shower in its place. Next I DIY’d a temporary update to my current bathroom vanity by installing a new sink top to my current unit, creating new cane doors, and finishing it by painting the cabinets in a deep navy blue. Eventually, I’ll tear this vanity out and replace it with a double vanity instead. For now, the situation is working for me.


On one side, the bathroom looked ok. The tile was outdated but other than that everything was livable. The same could not be said when looking at the other angle of the room though, with an old outdated bathtub, unsightly wall shelves holding a massive amount of clutter, and stark white walls with no decor to spruce them up.

When The Home Depot reached out and asked if I’d be interested in creating a bathroom makeover using their line of home decor they carry, I jumped at the chance! I was excited to see how many beautiful pieces The Home Decor carries!  In the past, I’ve typically shopped with them when looking for building supplies. I now know they carry so much more than that! From plush textiles to stylish home styling pieces, The Home Depot had absolutely everything I needed to put this room together!

This room will need a full remodel at some point, but for now, putting in a little DIY effort and investing in some luxurious items to make me feel pampered has completely transformed the ambiance in the room. My bathroom went from being a dingy catch-all space to a relaxing oasis with only a week's worth of work and some carefully chosen decor items.

The first order of business was to add some character to the galley-shaped room. I did this by installing a board and batten wall. This vintage style wall treatment is great because it is a simple and affordable install, able to be put up in just a couple of days. I also wanted to add some bold colors and patterns to distract from the 1980’s garden tub that I hasn’t been updated yet.

I choose a patterned wallpaper, installed above the board and batten wall trim, in a soft peach. Peach happens to be one of the most complimentary colors on most skin types, so it’s always an excellent choice for a bathroom.

Next it was time to add some attention grabbing pattern to the room. I went with a bold checkered floor using peel and stick floor tile as a temporary solution to cover my outdated tile that will eventually need to be replaced. The cool thing about this peel and stick option is that I was able to install it directly on top of my old tile. The process was easy and fast, not to mention the tile itself was ridiculously affordable. The impact on the space was huge, and gave nearly instant gratification. I have a feeling this won’t be the last time I’ll be using peel and stick tile. I’m already brainstorming other areas of my home where I might be able to utilize this convenient product.

Once my floors and walls were completed, it was time for the fun part! It was time to add all the pretty decor and lush pieces that bring a space to life.

As soon as I saw this oversized Picasso art piece, I knew I wanted it to be the center piece of my design. It includes bold colors that coordinate with the floors and walls, but also with some dissonance colors, adding even more the the visual interest.

Once my center piece of art was in place, I added another art piece in similar colors to add the color theme through out the room. I love the way the placement of this art piece reflects off the mirror on the opposite wall, drawing the colors to even more areas of the room

I continued to decorated my space with a collection of pieces from The Home Depot in my color scheme of peach, rust, white, and blue. An oversized vase holds a few sprigs of branches nodding to the soon coming Fall season. A smaller peach vase adds not only color but texture as well, creating more visual interest.

I added a few marble bathroom accessories such as a tray and soap dispenser for more texture depth. And displayed the shelves across from the vanity are a collection of items that continue the color and design scheme of the room while offering extra storage as well.

What is a bathroom makeover without soft textiles to bring the comfort of a spa to your design?

Luxurious towels hang by the bath on a ladder for easy reach. A pair of textured rugs layer on the floor, creating a soft space for my feet after a long day.

A pair of plush bathrobes hang from sleek gold hooks on the wall, utilizing form and function by becoming part of the room decor as well as being useful.

Two lanterns near the tub are ready to be used to create a warm glow in the evenings.

A wooden stool table sits close by to hold any bath necessities one might need, and brings more warm wood tones to the room.

A pair of cane shelves hang opposite the vanity, mimicking the cane on the vanity doors and adding extra storage.

One of my favorite additions is the oversized mirror with interior jewelry organization hanging on my door. This unique pieces offers a full length mirror view in the bathroom, and as a bonus slides open to reveal hidden storage with space for every type of jewelry, plus extra shelves for storage.

As with all my designs, I sprinkled plants around the room to liven the space up even further.

In the shower I added another wooden stool, and for a little whimsy, a fun carved wooden mushroom.

I’m still amazed at what a significant impact this small makeover had on my bathroom. It just goes to show how just a bit of effort and intentionality can create a  gorgeous room without having the price tag of a traditional bathroom makeover. You don’t have to let a small budget keep you from creating a room you love! My bathroom is a case in point for that truth!

I also love how all of the updates I made in this room are entirely reversible, making them perfect for a rental home as well.

ITEMS USED IN THIS PROJECT

Wallpaper Peel and Stick Tile Ladder Shelf Towels Bath Stool Tray

Lanterns Faux Tree       Coral Planter     Bath Robes     Picasso Art Abstract Art                          

Wall Shelves Gold Bathroom Accessory Set Marble Bathroom Set Tall Vase Coral Vases

Pink Abstract Mat White Floor Mat Vanity Mirror       Jewelry Storage Mirror

Faux Plant Gold Abstract Decor Coral Decor Mushroom Decor Shower Stool

White Planter Faux Tree


Essential Lighting Guide for Everyday People

Choosing a light bulb can become overwhelming and confusing. This guide will easily break down everything you need to know in order for you to confidently choose the perfect light for your home and life!

Read More

Creating an Outdoor Patio Oasis

My dream patio oasis was easy to put together using a few destinct peices. I’m now ready to enjoy my modern, boho enterainment patio space just in time for Spring!

Read More

My Divorce and Spiritual Transformation.

January of 2020 dawned on my lowest and most desperate season. All I held dear; my family, my marriage, my faith, had been gradually unraveling. With thread by painful thread slowly pulling out of place, I entered the year with only a frayed, uncertain remnant of a foundation. Holding it out in both hands, I knew it wasn’t much to look at. Certainly not enough to hold a lifetime together.

In a way, the intensity of the soon to come pandemic of February 2020, with its pressure cooking environment, was a severe mercy. It allowed a painful journey to be brought to swift and clear finality.

During the heart of the pandemic, in June of 2020, I lost my 18 year marriage, while becoming a single parent. Those days are hard to think about without tears. Hard to talk about as well. But looking back what I remember above all else was the paradox of holding in one hand a full measure of brokenness, while in the other hand a gentle grace that sustained me daily. During that season I met Father, Son, and Spirit in such distinct ways. Their nearness was constant and didn’t run out. Each day I had the measure of strength for what I needed.

In 2021 I began the work of untangling all that had happened over the last few years.

During those years the foundation of my faith had been severely assaulted from more than one source. More than a few close friends had recently dismantled their faith, many of them leaving it behind all together. Their arguments and reasonings left my dizzy to a point I barely knew left from right or up from down. When asked to describe how I was feeling, my one word answer was always “confused”.

Even though I had experienced such presence and grace throughout my separation and divorce, I wasn’t able to make the spiritual connection from my heart to my head. Whenever I thought about faith, or picked up a Bible, a million accusations and doubts towards God circled in my mind. I needed answers so I could make sense of direction and move forward with my life.

It was during that season I began repeating a singular prayer every morning. My prayer was simply this: “What is the Gospel, and why is it good news?”

Every morning I’d ask it.

“What is the Gospel, and why is it good news?” In light of my divorce, what is the Gospel? In light of this brokenness, what is the good news? In light of our culture wars, in light of racism, in light of COVID, in light of sex, what is the Gospel and why is that Gospel good news?

Soon I was brave enough to pick up my Bible again, but this time taking it in with an insatiable appetite while daily asking God’s Spirit to help me understand where I was confused. I dove into biblical scholars and studied what didn’t make sense until I found answers that satisfied.

During that season I began to feel as if I was walking in divine appointment. Sources started coming from the most unlikely of places. Phone calls from a distant friend across the miles with a word at the very moment I was praying for answers. Randomly bumping into people while running errands who happened to speak a needed truth over me. I was reaching out for God and He was reaching back out to me. It was wild and beautiful.

I began reading anything I could get my hands on that might help me understand what had happened in not only my marriage but in other areas where I saw the same scenario playing out.

I began reading a wide range of ideas from Marxism, Luciferianism, New Age philosophy, Christian authors old and new, ancient demonology, many many dissertations on cultural issues and SO. MUCH. HISTORY. Nothing was off limits as I ingested whatever might help me connect the dots to the patterns I was seeing around me.

All of these circumstances and all of this information culminated on a very average Tuesday morning in the Fall of 2021.

It was on that morning I decided I was done searching. I was done being the skeptic peering over the fence at faith. I didn’t have 100% of my questions answered, but I had seen enough to know where I wanted to rest my faith. As I sat in that familiar prayer space in my bed, I prayed these words: “I’m done being halfway in! I’m fully in! All of me and all my faith. You have it. You and Your Word and Your kingdom is where I place my stake!!”

What happened next is hard to explain and caught me off guard. It was as if suddenly the eyes of my spirit opened and I saw past the physical into the depth of God’s goodness and glory. I saw myself too, in contrast, with my pride, my self-centeredness, and small minded living. I can only describe that moment as the sweetest repentance I didn’t know was possible. With tears streaming down my face, the smallness of my life was being swallowed into His overwhelming glory and goodness! Tears and head down in my pillow all I could say was “Of course I choose you! Of course I choose you! Why would I ever choose anything else?”

Much has shifted for me since that moment. Some of it was instant and some of it has been slowly growing over time. My perspective, my values, my pursuits, they’re conforming more to the eternal. I am so grateful, and am so satisfied!

This is not a new story in history, but now it’s my story. The one where God chooses our deepest pain to infuse His glory so squarely in the center of it that when His light shines through, it’s hard to distinguish our brokenness from His brilliance.

While I would have never chosen this journey for myself, God is in the process of restoring my heart and giving me a priceless gift in the process.

I’ve been very quiet about what has happend in my life over the last couple years, especially here on my personal social media. It’s painful and awkward to talk about my divorce and I know it leaves a lot of unanswered questions.

But over the last couple weeks I’ve felt a continuing nudge to share this story. It makes me think that there’s someone who needs to read it. And not just read it, but have someone to talk to.

If that’s you, consider this your open invitation to reach out. If you need someone to talk to, please dm or text.

I won’t have all the answers, but I have so much confidence that God is pulling you in and He wants to meet you.

And I’d love to pray with you.

With so much love,

-Jodi

A MODERN BATHROOM MAKEOVER ON A BUDGET

This blog post was created in partnership with Peerless Faucets

This master bathroom of mine has been an eye sore since the day we moved into our home 8 years ago. For years I’ve dreamt of completely reconfiguring it’s awkward layout design, a remodel that would extend into the adjoining closet space to create the master bath of my dreams. The reality is that a project that scale would be an investment of about $30,000, an amount that isn’t currently in this single Mom’s budget.

I was facing a dilemma though, because the state of this 1980’s bathroom wasn’t one that I wanted to simply live with while I waited to break ground on the official remodel. 

Because of that, I decided to do what I like to call an ‘In the meantime makeover’, where I focus on small cost but high impact projects in order to create a more livable environment while I wait. 

The first upgrade was to rip out the yellowing builder grade inset shower surround that was original to the house. In it’s place I created a tiled in shower. To save on cost, I used inexpensive 3x6 subway tile, installing them in a grid pattern to create a modern yet affordable look.

I replaced my old shower head with the Precept Shower Kit by Peerless in matte black. I’ve used Peerless faucets before and love their sleek modern look and functional durability. I chose the Precept design for it’s versatility in enhancing a variety of styles - In other words, a shower kit that would continue to work even if I chose to later go a different direction with the style of this bathroom’s remodel!

Updating my existing vanity was a bit more of a process. Vanity units typically take up a large chunk of a remodels budgets, and I knew that when I did my final remodel I would install a double sink vanity as opposed to this single sink. I didn’t want to spend the cash on a whole new vanity that I would eventually rip out, so I decided to give my current vanity a makeover!

I took off the old laminate vanity top and replaced it with a cultured marble top that I was able to source second hand.


I painted the base of the vanity a dark navy blue and built new doors featuring DIY cane centers, updating them with new cabinet knobs and finger pulls.  I had a little trouble getting my DIY doors to hang straight, which made them naturally swing open instead of close. To fix this I installed cabinet magnets to the inside of the doors and they work like a charm keeping my doors closed.

I replaced the frameless wall mirror with an oversized round version, and updated the vanity scone with a rubbed bronze version.

There’s one more project I’m considering for my ‘In the meantime makeover.’ I will eventually need to replace the tile floor in this bathroom, but I’m considering trying out the painted tile technique to give my temporary floor tile a little love while I wait! What do you think? Worth the effort?

Stay tuned as I continue to take these projects over the finish line! 


All the best, 

Jodi


Master Bedroom Tour →


Master Bedroom Tour

It’s been a crazy year! In the middle of it all, I knew I wanted to create a room that was soft place for me to land. Inspired by French apartment chic. I used modern lines and soft colors to create a relaxing retreat for myself. One that soothes, yet also inspires!

One of the statement pieces in my room is my half moon bed frame in blush velvet. This bed is from the Mr. Kate line and you can find in on Amazon HERE . One of my favorite features is that the sides of the bed pull out as individual drawers creating some needed extra storage!

Another statement piece is the Paige 9 light chandelier by Mitzi. I almost ordered the light in aged brass, but switched to old bronze at the last minute! I’m so glad I did! The black absolutely pops agains the white surrounding and is a nod to the black accent wall behind it.

My dresser is a vintage makeover project (you can watch the transformation here ). The robe and marble book end are from Target. The planter is H&M, and the tall pink vase is from At Home.

My dresser is an Ikea Karlstad. I created my own custom drawer pulls to give it a modern look. You can find that DIY here.

The standing mirror in the corner is from Ikea. It’s been discontinued and replaced with this version.

The chair in the corner is from World Market, you can find their updated variation here. The wall sconces are plug in and are from Mitzi. You can find them here.

DIY Large Scale Are - No art Degree Required

DIY LARGE SCALE ART (no artistic skill required -promise)

Today I’m going to show you how to make the easiest DIY Large Scale Canvas art out there! And no, you don’t have to have any artistic genius to pull this one off! Anyone can do it! Here’s what you’ll need.


SUPPLIES

I tried to keep today’s supply list as simple as possible. You could go with raw unbleached canvas if you wanted your art piece to be more professional, but I simple picked up a yard of white duck canvas from my local Hobby Lobby to keep it simple. I’ve added the 3M Spray adhesive for those who don’t have access to a sewing machine. If you do have a sewing machine, I would sew a pocket for the dowel to slip through as opposed to glueing, but again, I wanted to keep things as simple and as possible for this project!


TOOLS

Front Porch Makeover

Front Porch Spring Makeover

Front Porch Makeover

A hint of Spring is in the air, and I’ve been feeling the urge to clean up my outdoor spaces in order for them to be enjoyable the very day it is warm enough to do so.

The first space I decided to tackle was my front porch area. Over the winter it had become a catching place for muddy boots, a few withered plants I had given up on, plus some of my exterior fixtures were in desperate need of an update.

The first item of business I tackled was updating my door hardware. I had been living with a grimy door handle from 1986, one that a year ago I attempted to revitalize with black spray paint with disappointing results. Eventually I’d like to invest in all new door hardware for our home, which would be upgrading the front porch with a smart lock, but for now I decided a new inexpensive handle would be a worth it hold me over until that time. I choose this door handle and deadlock set from Amazon and it was easy to install and created an instant upgrade!

911922B9-4434-4DB6-A4CF-F0B21A880DC0.JPG

I removed my Christmas door wreathe and replaced it with this Spring inspired boxwood wreath from Target, hanging a colorful tassel in the center to liven things up a bit.

I layered two rugs at my front door. The first is from World Market, and the striped rug underneath is from Bed Bath and Beyond.

I frequently get asked the color of my front door. I painted it in Honeycomb from Sherwin Williams, using left over paint that I had from my kitchen cabinet makeover.

Once the door was ready for Spring, I replaced the overhead front door light. The fixture I removed was original to the house, and had decades of outdoor grime surrounding it. I replaced it with a simple lantern style fixture from Amazon and it instantly made the entire front porch look updated.

Yellow Front Door

Most of the front porch furniture is a couple years old, and I simply moved a few pieces around the make it feel more comfortable. The fireplace log hoop is from Bed Bath and Beyond, as well as the two tall black planters, the outdoor lanterns, and the rocking chairs. The black bench is Project 62 for Target, and the rust colored throw pillows are from World Market. The large box you see is my DeliverySafe parcel holder. It’s a lockpad protected, weather proof, insulated box that allows me to receive packages and groceries worry free.

This afternoon, the temps rose to the 50’s and it was ALMOST warm enough to enjoy my coffee on the front porch! I’m guessing we’re a week or so away from that point! I’m so glad I’ve spruced this porch up in time, because I want to enjoy that day the moment it arrives.

DeliverySafe2.JPG